3 Powder Over-the-air operation
This chapter will walk you through the process of instantiating a Powder experiment for over-the-air operation.
3.1 Overview
The Powder over-the-air experimental workflow follows the same basic approach described in the getting started chapter. However, over-the-air operation involves radio frequency (RF) transmissions, that are subject to FCC regulations. The implication of this is that over-the-air experiments cannot be instantiated on-demand. Rather all over-the-air experiments need to pre-reserve all resources that will be needed by the experiment, including spectrum, before the normal experiment instantiation process can be started.
In summary, the steps involved with instantiating an over-the-air experiment in Powder are:
Select a profile you want to instantiate and note the resources required from the profile description.
Request a reservation for the (sub-)set of resources you need.
Once your reservation is approved, follow the normal experimental workflow process to instantiate your experiment.
Note: This process is expected to evolve as we gain more experience with over-the-air operation on Powder.
3.2 Spectrum use
Every Powder experiment must declare its spectrum usage in advance: while arbitrary reception is possible, transmission on any frequency is permitted only by prior permission.
Program Experimental licencees may submit experiment notifcations on the FCC OET Experiments System site to operate within the Salt Lake City Innovation Zone. Details are available in the Public Notice announcing the Innovation Zone.
The frequency bands appropriate for experimenter use varies by node type; more details are available in the hardware chapter. The following table provides a summary of frequencies for currently operational equipment:
Frequency (GHz) |
| Operational node types |
| Base station cellsdr nodes; Fixed endpoint nuc and ue nodes | |
| Skylark Wireless Massive MIMO | |
| Base station cbrssdr nodes |
3.2.1 BRS Channel Use Information
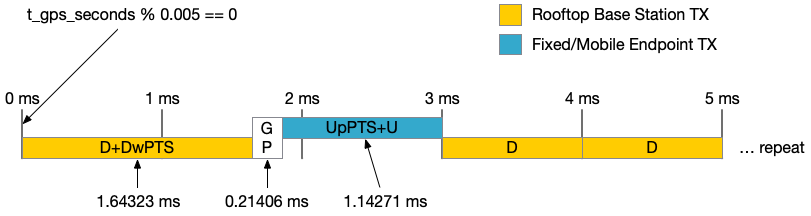
Powder provides access to 10 MHz of spectrum (2496-2506 MHz) in the BRS range (band 41) for experimental use. Transmissions in this spectrum must adhere to a specific LTE or 5G-NR TDD frame and subframe configuration with downlink (rooftop base stations) and uplink (mobile/fixed endpoints) transmission periods synchronized in time with commercial operators in order to avoid interfering with their adjacent channels. Specifically, transmission from rooftop base stations is disallowed in the period between 1.64323 ms and 3 ms after the beginning of the second as determined by GPS* and repeating every 5 ms thereafter.
The required LTE uplink-downlink frame configuration is number 2 with special subframe configuration 6 (see 3GPP 36.211 and this LTE TDD Reference), which has this arrangement of downlink (D), uplink (U), and special (S) subframes: DSUDD. Each subframe has a duration of 1 ms and the pattern repeats every 5 ms. The special subframe in this pattern includes more time for downlink transmission (DwPTS), followed by a guard period (GP) to allow for time-of-flight differences for downlink reception, followed by more time for uplink transmission (UpPTS) prior to the next uplink subframe. Special subframe configuration 6 sets the durations for DwPTS, GP, and UpPTS as follows:
DwPTS: 0.64323 ms
GP: 0.21406 ms
UpPTS: 0.14271 ms
For 5G-NR, DDDSUUDDDD with SF27 timing configured as 3:8:3 should be used. The special subframe consists of downlink for 107.14us, guard period for 272.71us and uplink for 107.14us.
* The radios on the rooftops use an Octoclock for their time reference. These Octoclocks are synchronized using WhiteRabbit to a GPS disciplined oscillator. The Octoclock is connected to the 10 MHz and PPS radio inputs. As such you should use the external frequency and time inputs for synchronization. This is done with a set_time_source("external") call via the multi_usrp object API.
3.3 Step-by-step walkthrough
The step-by-step walkthrough below will instantiate an over-the-air experiment using the srsLTE open source software stack. The walkthrough assumes you have an account on Powder and have your own project that has been enabled by Powder administrators for over-the-air operation. (Specifically, you will not be able to use the "TryPowder" project to instantiate this profile.)
- Log into the portalStart by pointing your browser at https://www.powderwireless.net/ and log in.
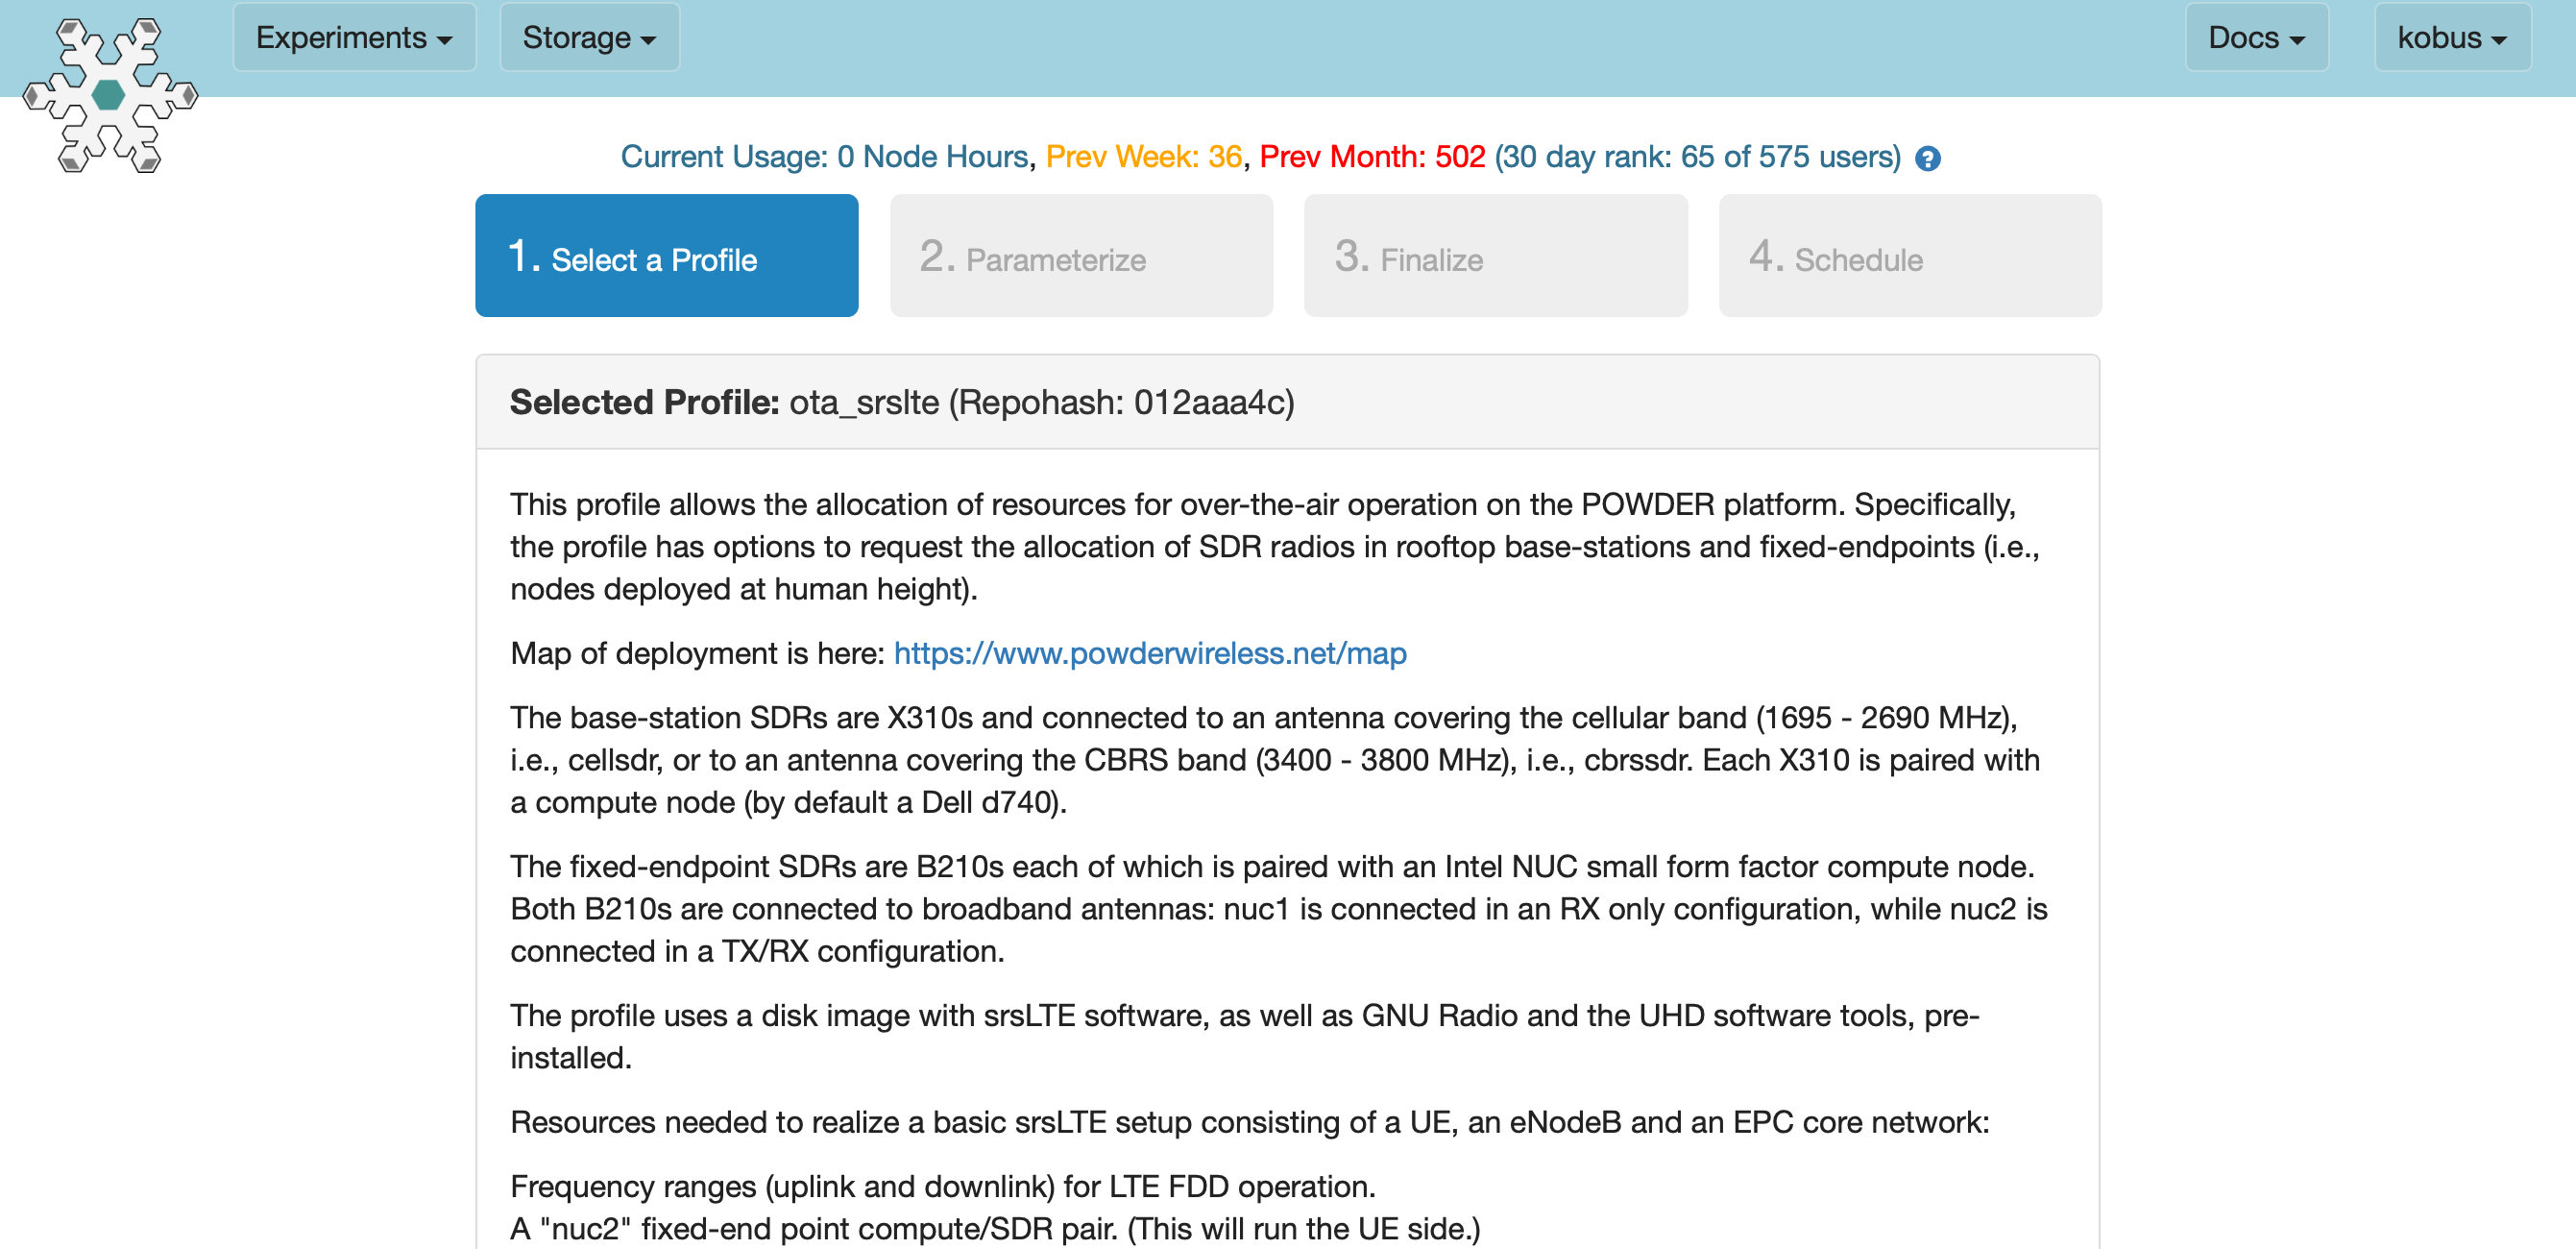
- Find the resources needed by the ota_srslte profileWe will use a basic srsLTE profile developed by the Powder team. You can find the "ota_srslte" profile at this link. Alternatively you can search for the profile: Select "Experiments" and then "Start Experiment" from the portal. Then select "Change Profile". In the search box enter "ota_srslte" and select the srsLTE OTA profile provided by the Powder team.In the profile description, note the hardware and frequency resources that are required for this profile.For this activity we will select the following specific resources:Hardware: Humanities, nuc2; Emulab, cellsdr1-browning; Emulab, d740Frequency: 2560 MHz to 2570 MHz, 2680 MHz to 2690 MHz
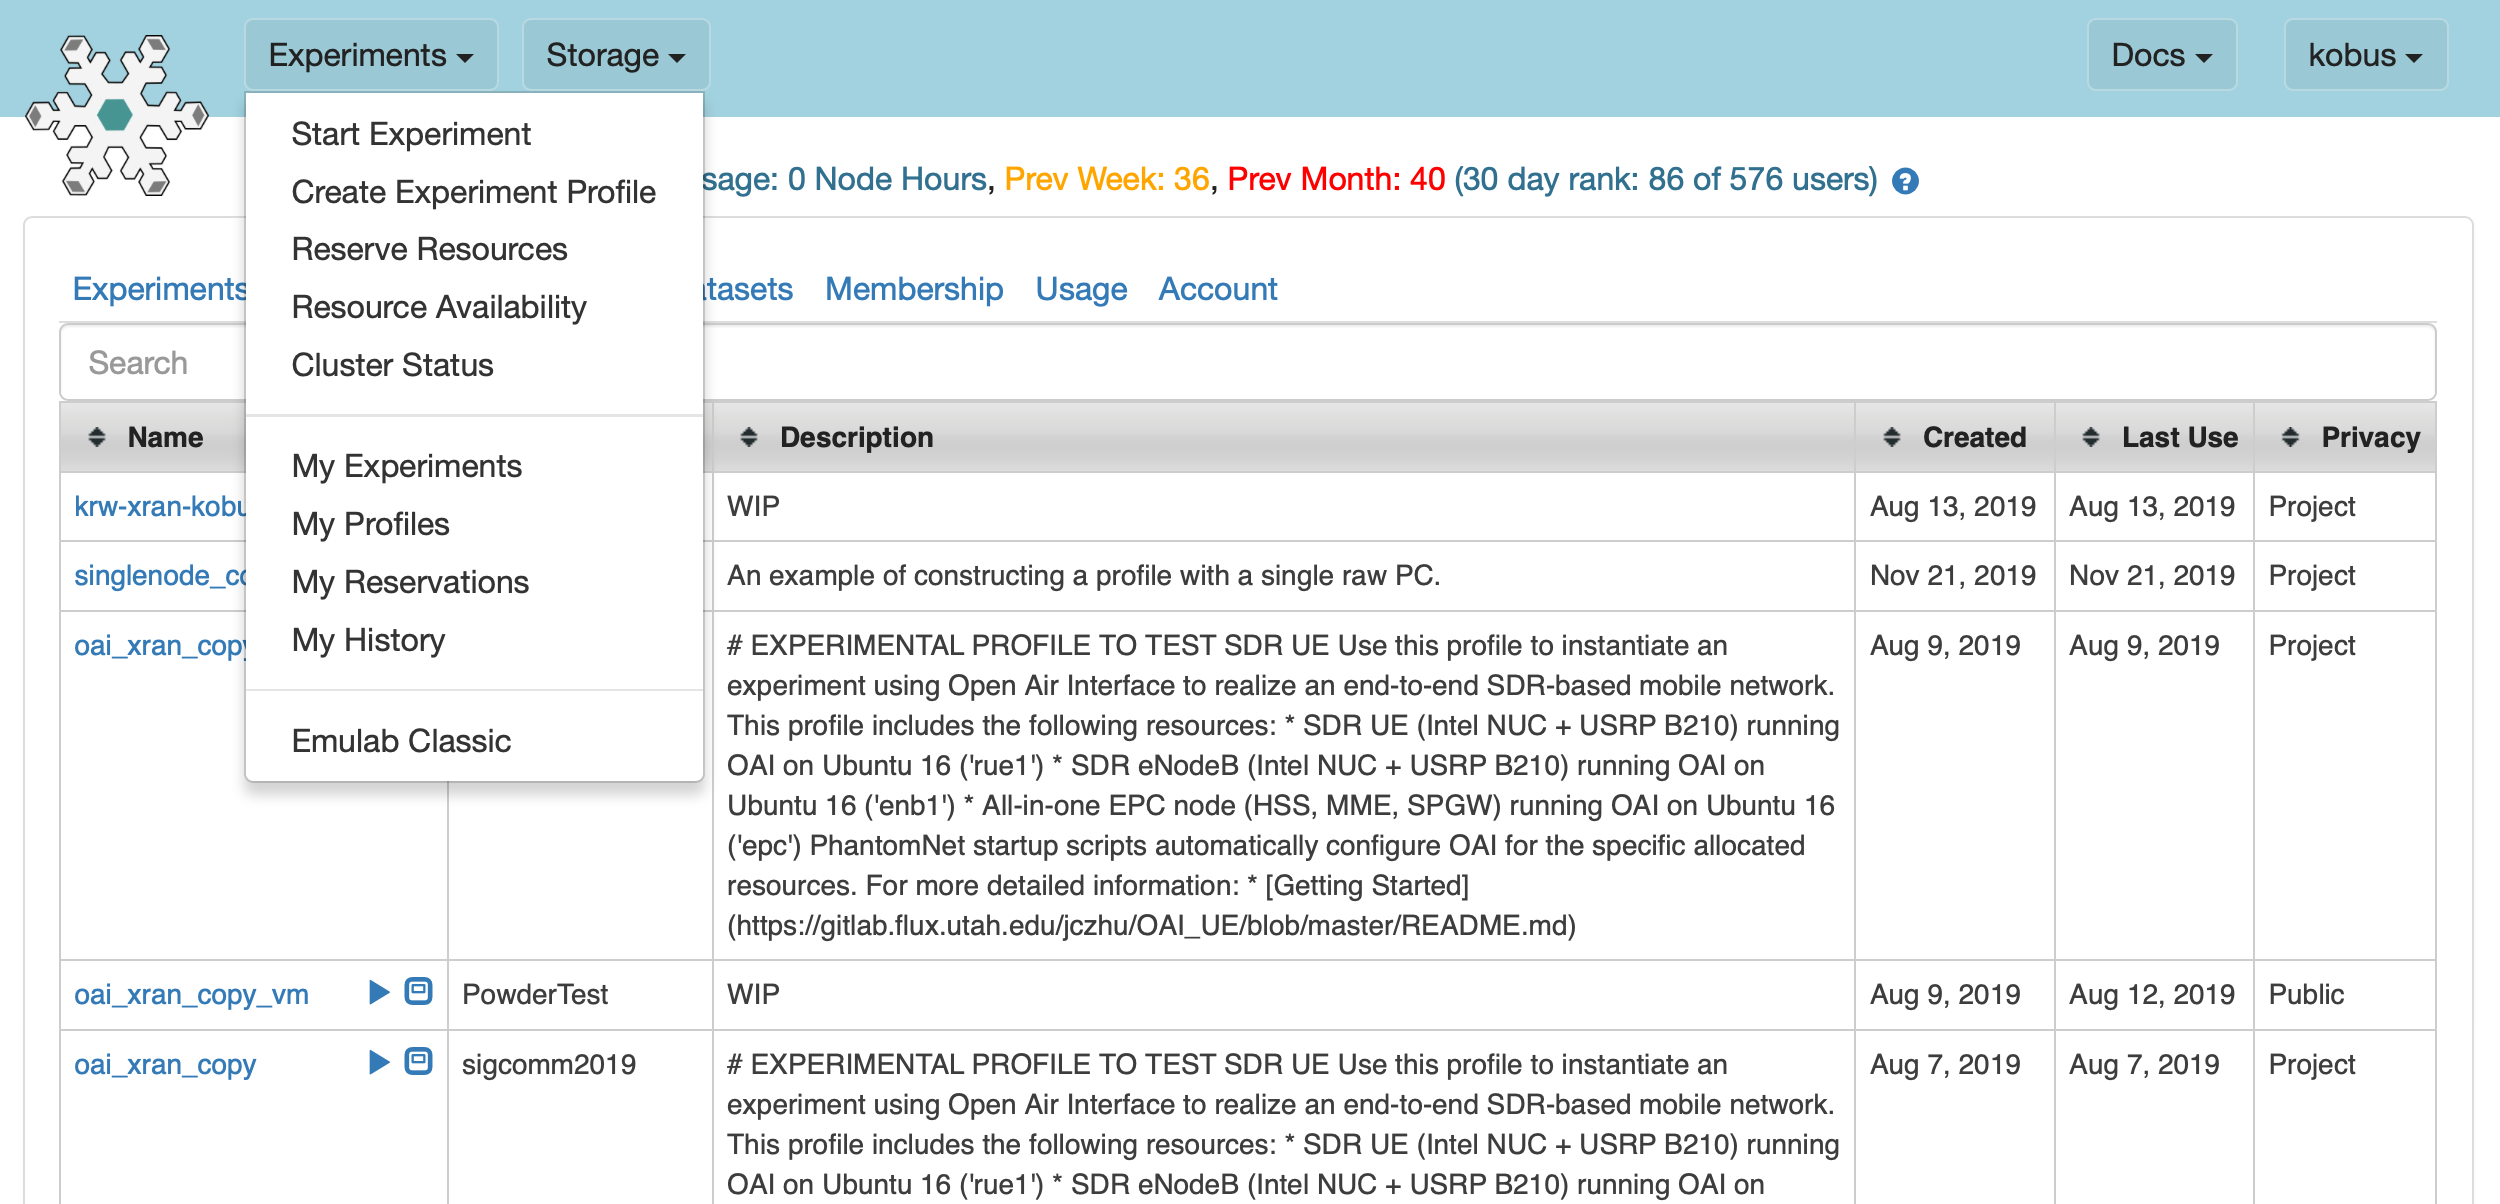
- Go to the resource reservation pageWithin the Powder portal, select "Experiments", then select "Reserve Resources" from the drop down menu.
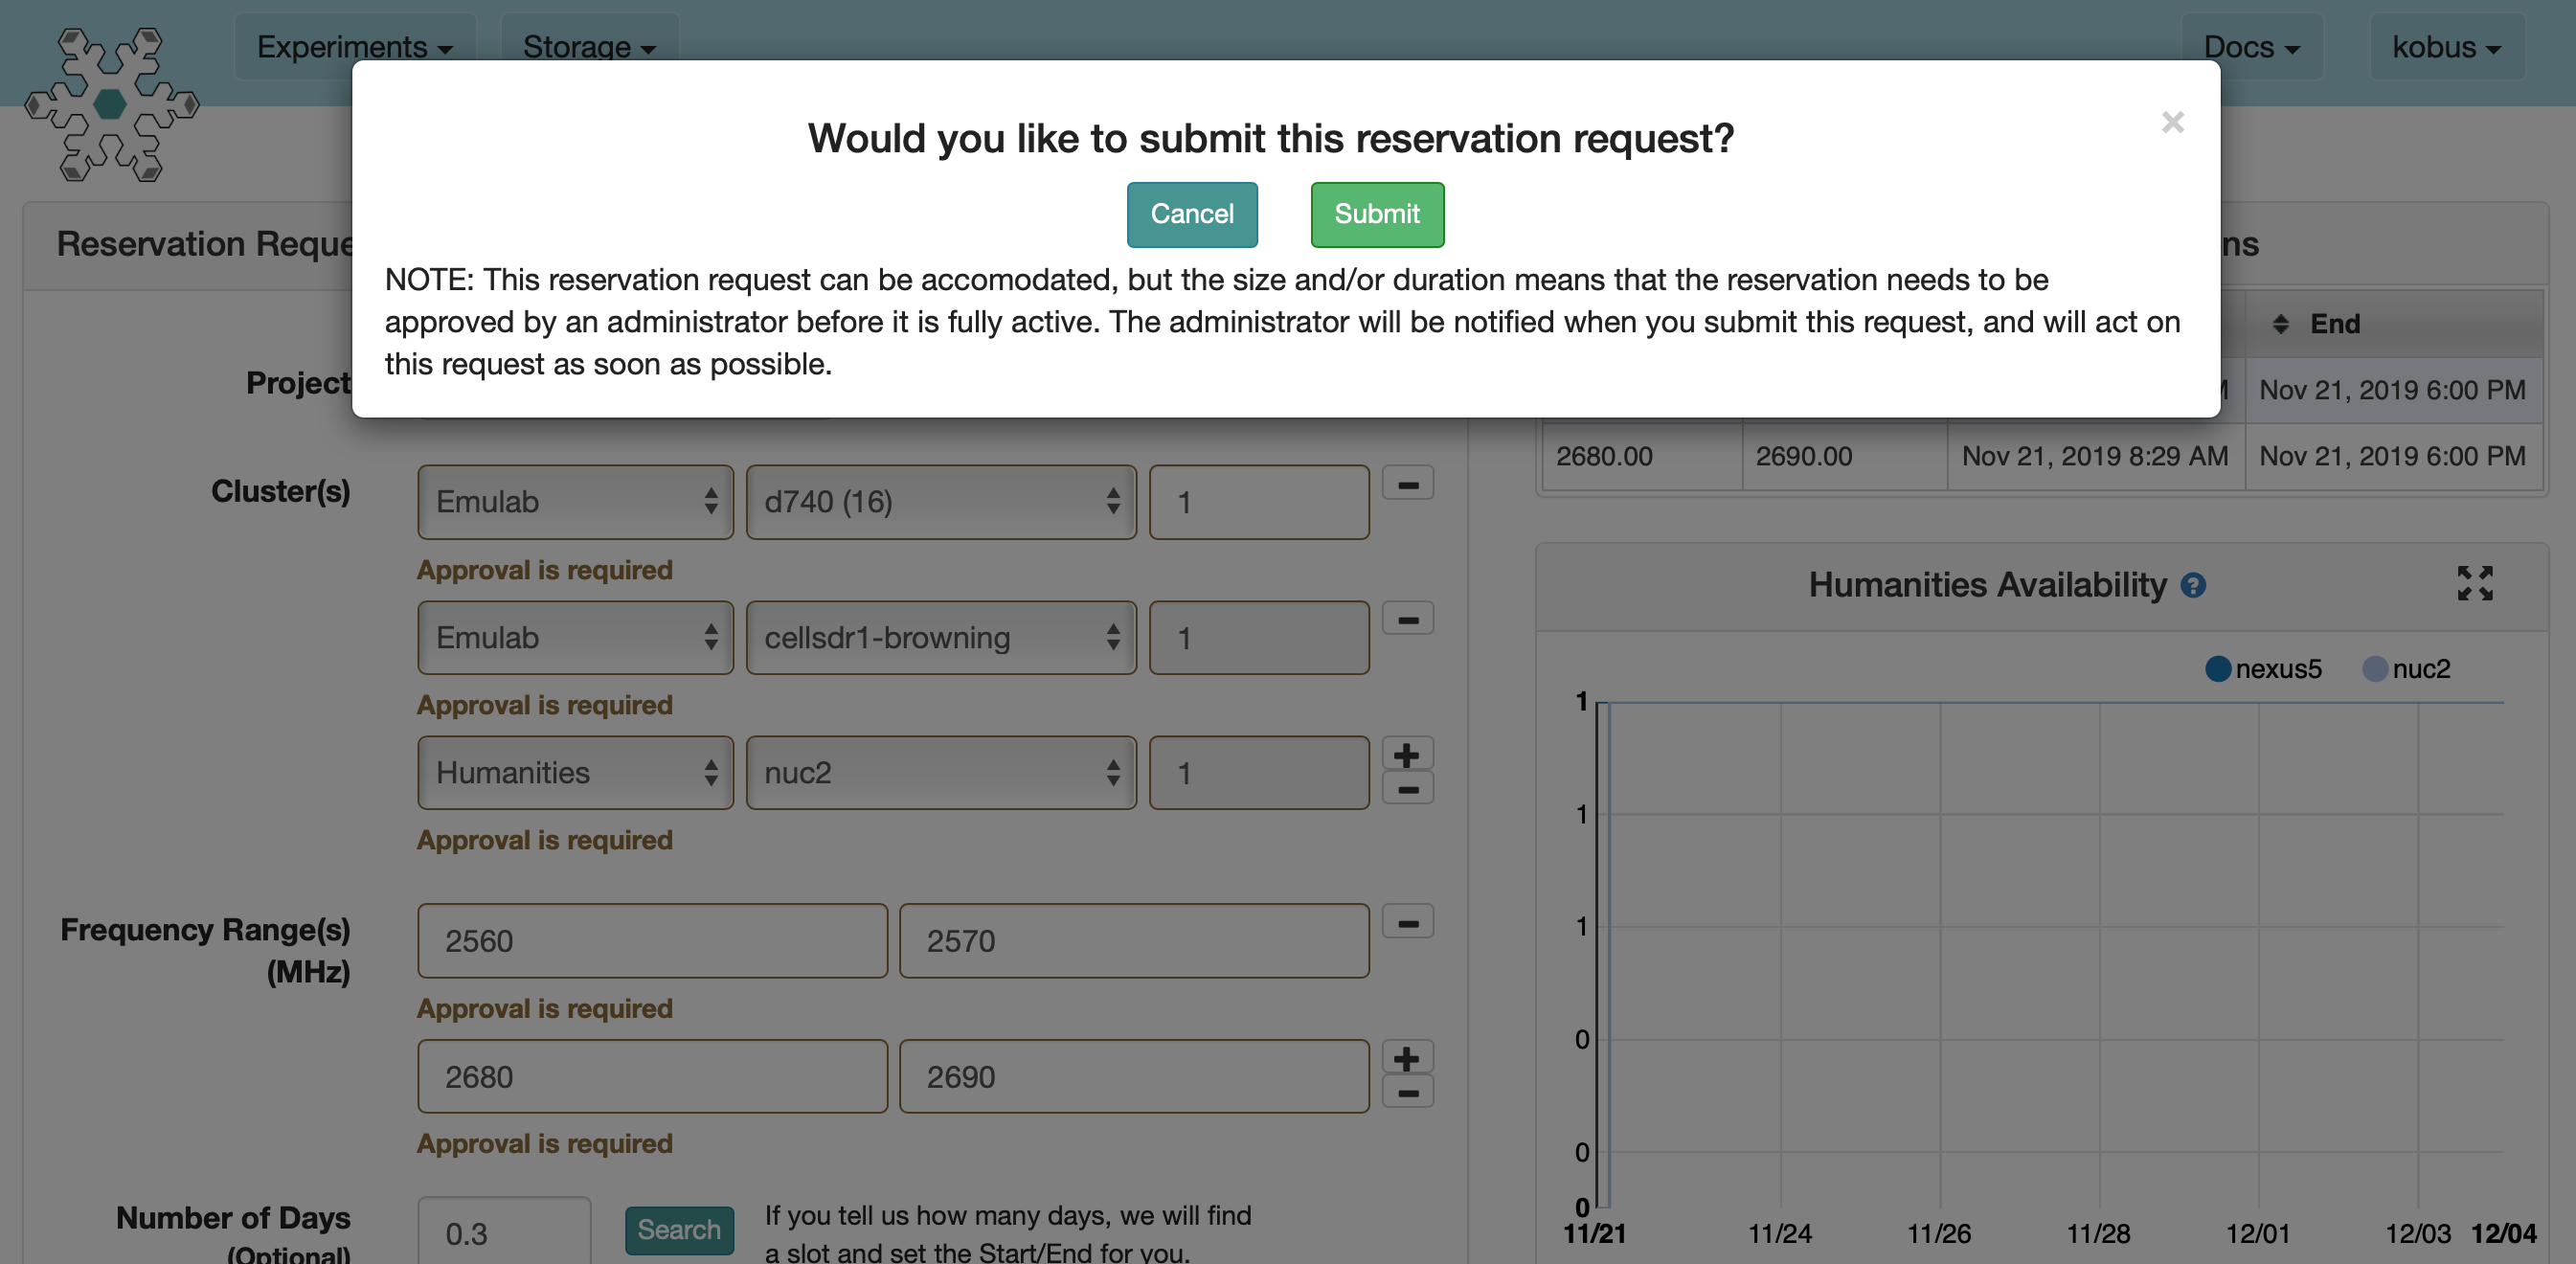
- Reserve the resources required by the ota_srslte profileFill out the reservation page to reserve the specific resources identified above. Note that resource reservations are tied to specific projects. You will have to use your own project here, not the Powder team project ("PowderTeam") shown in the screenshot. (The "TryPowder" project used for the getting stared activity also can not be used for over-the-air operation.)Select a date and time for your reservation and provide a "Reason" description.Once you have completed all the required fields, select "Check" to see if your reservation request can be accommodated. You might have to adjust your request (select different resources and/or change you reservation time/date) to make it fit. Note that the table/graphs on the right of the Reservation Request page show current frequency reservations and resource availability.

- Submit your reservation requestIf your reservation request can be accommodated you will be presented with a pop-up window to "Submit" the reservation.Once you have submitted your reservation you will have to wait for the reservation to be approved by Powder administrators before proceeding with the rest of this activity (during the time slot requested in your request).
- Select the profileYou will receive email when your reservation request is "approved" and also when your reservation becomes "active".When your reservation becomes active you can proceed to instantiate the ota_srslte profile. (Alternatively, you can follow the steps below as soon as your reservation is approved, but in the "Schedule" step, schedule the instantiation of the profile to coincide with your reservation.)As before: You can find the "ota_srslte" profile at this link. Alternatively you can search for the profile: Select "Experiments" and then "Start Experiment" from the portal. Then select "Change Profile". In the search box enter "ota_srslte" and select the srsLTE OTA profile provided by the Powder team.
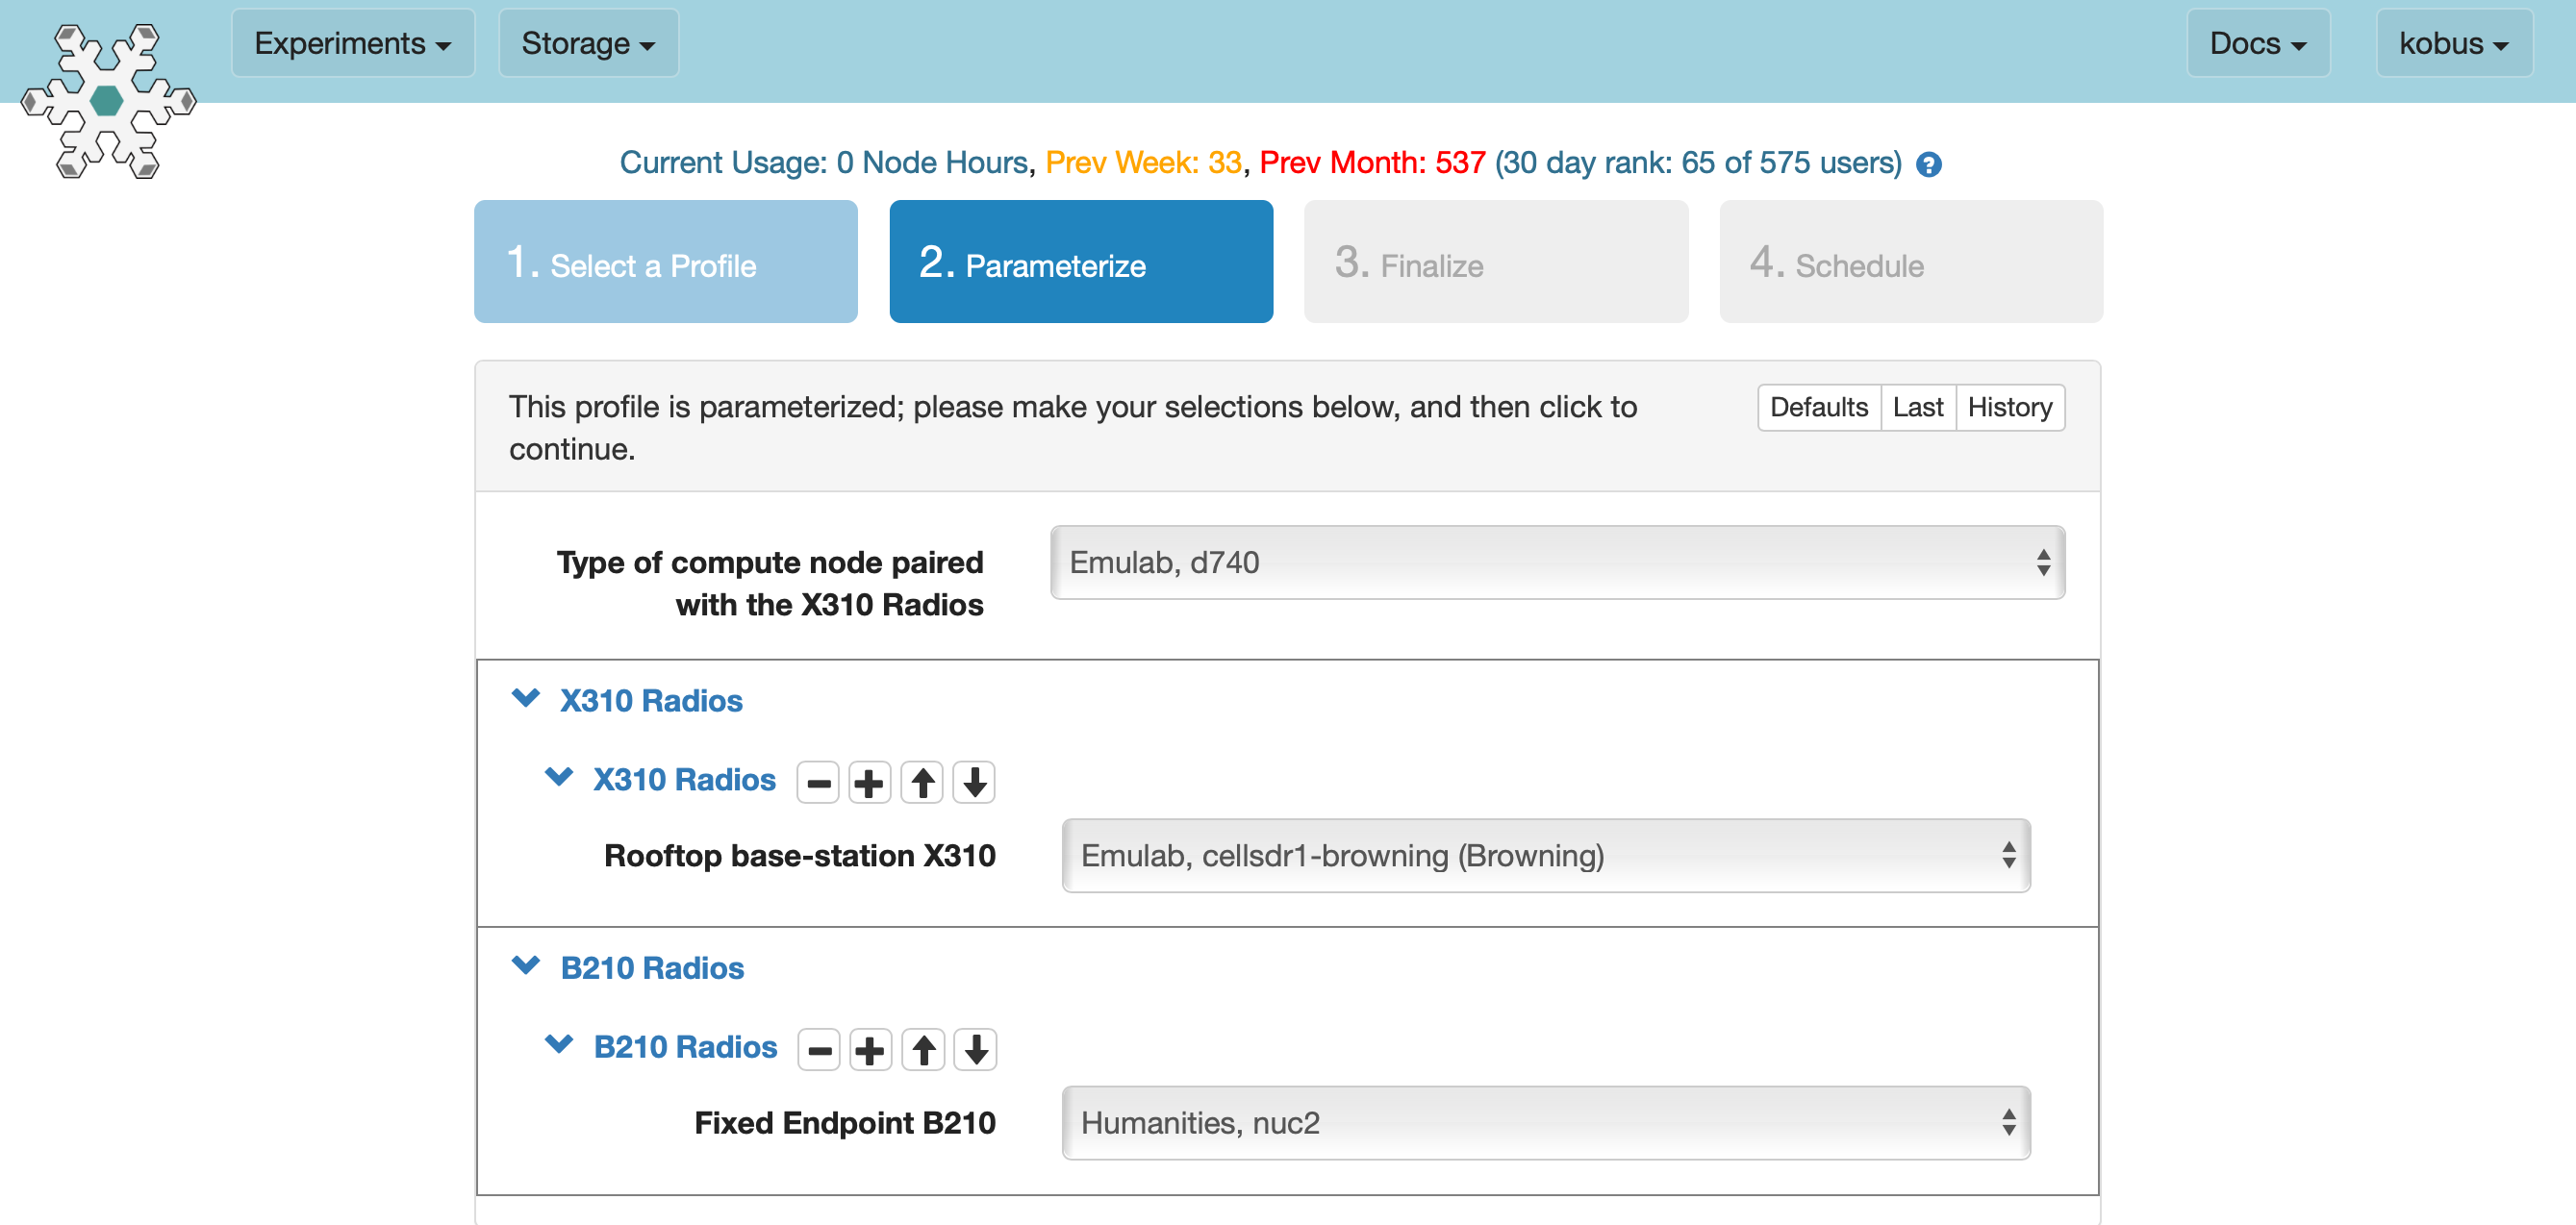
- Select resources for your profileIn the "Parameterize" step, select the same resources you requested/received approval for.For this profile frequency resources are directly specified/requested by the profile.
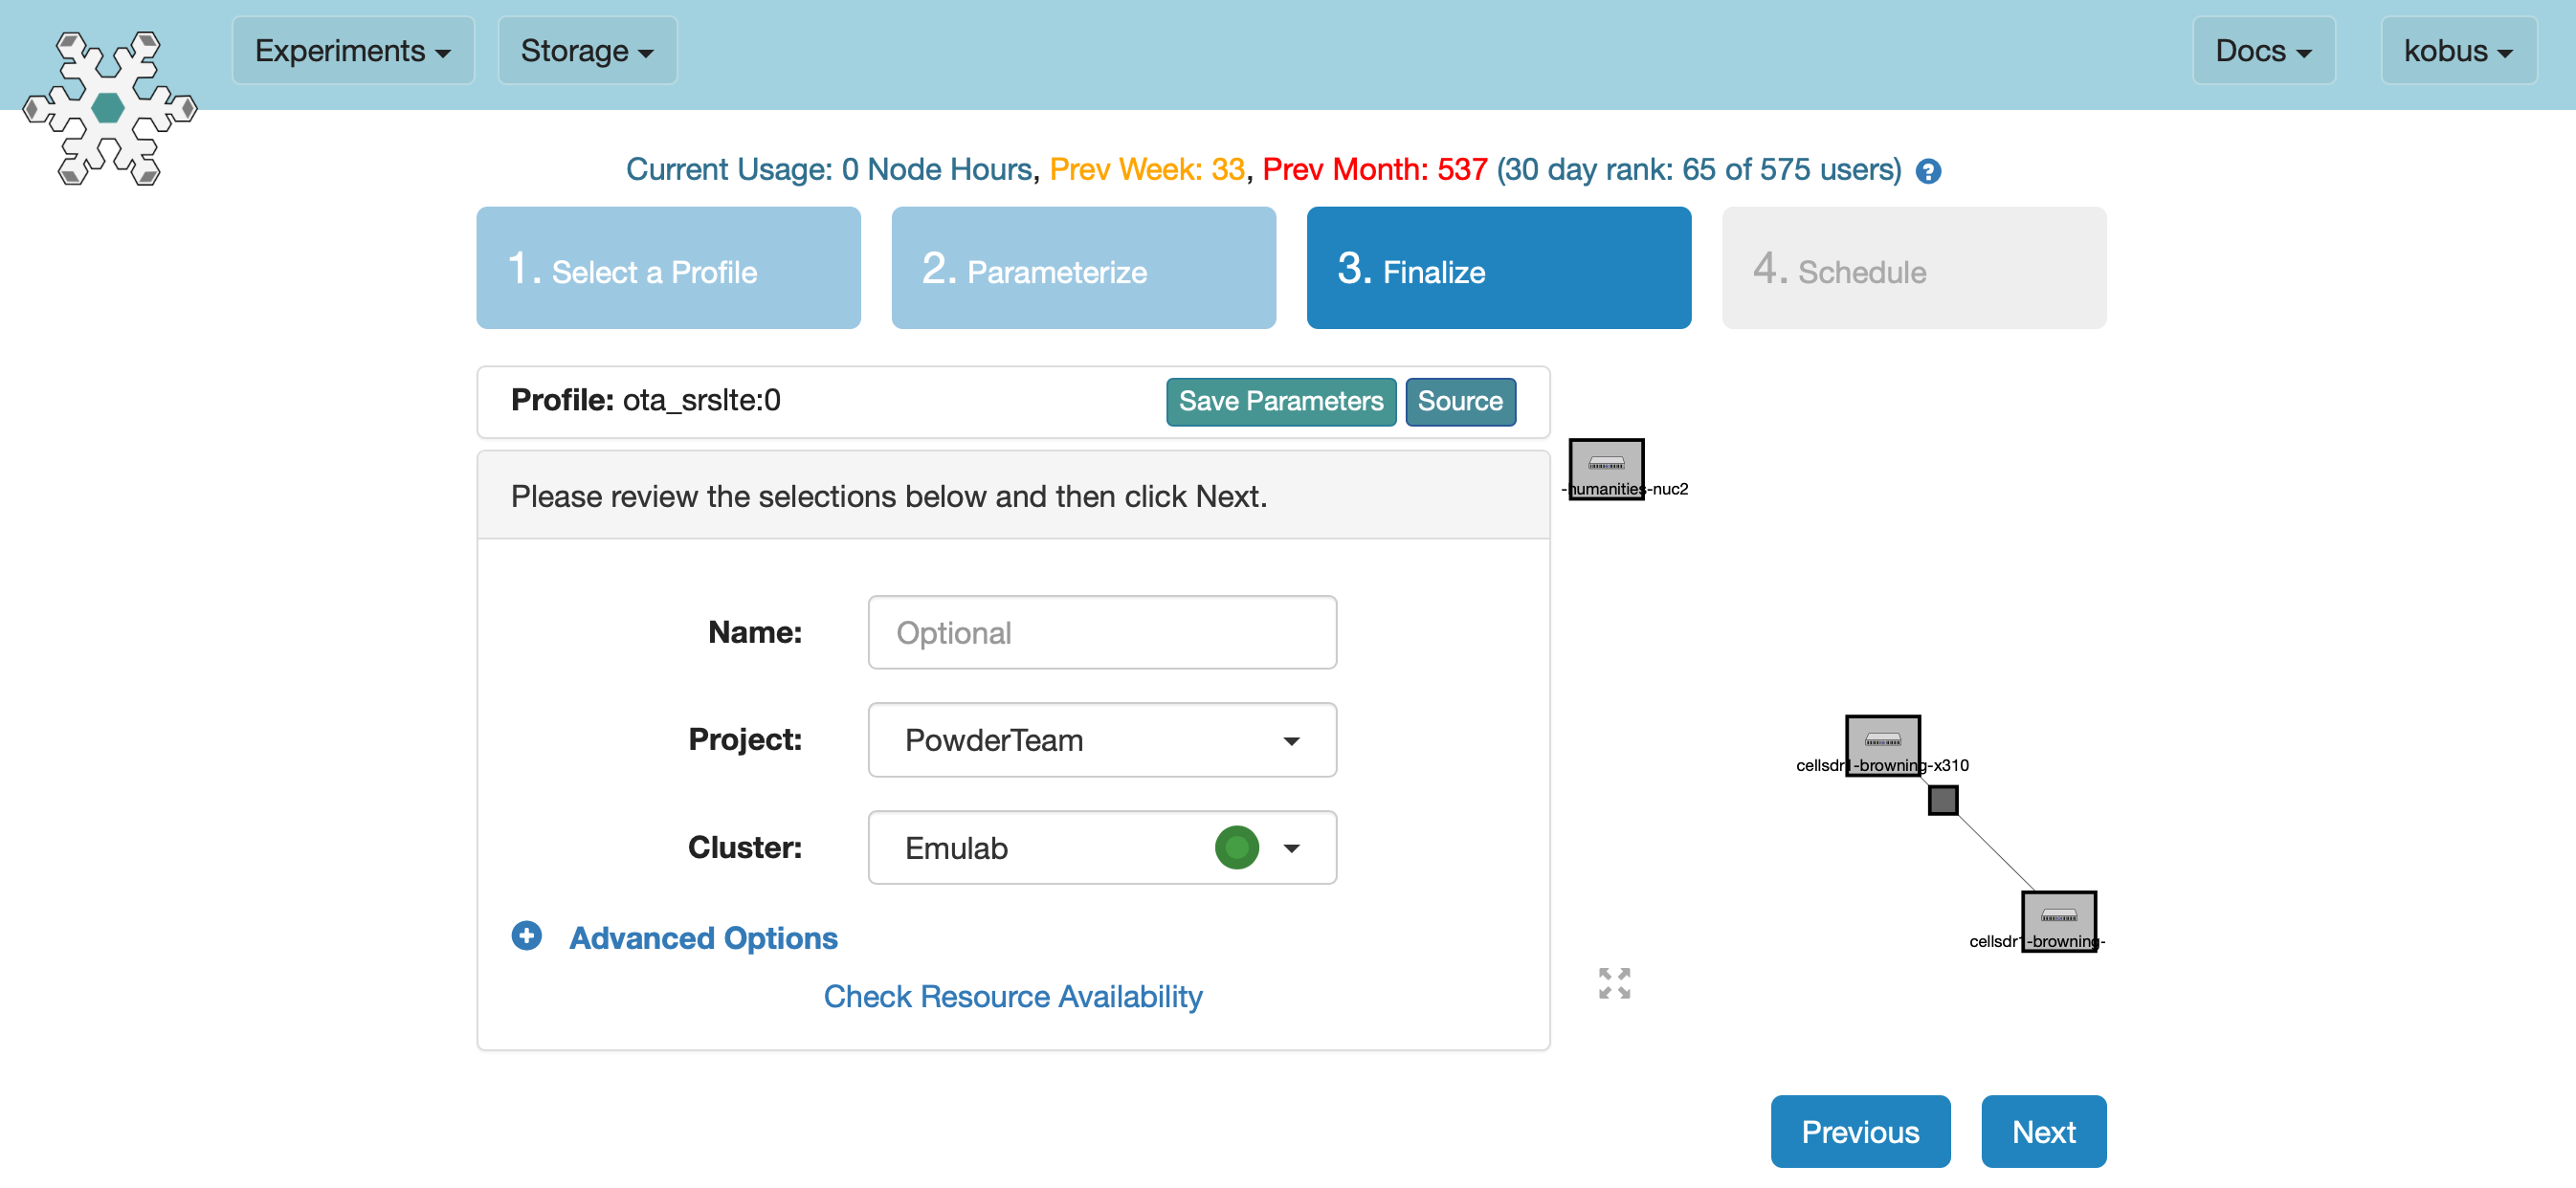
- FinalizeIn the "Finalize" step, be sure to select the same project under which you submitted the resource reservation request.
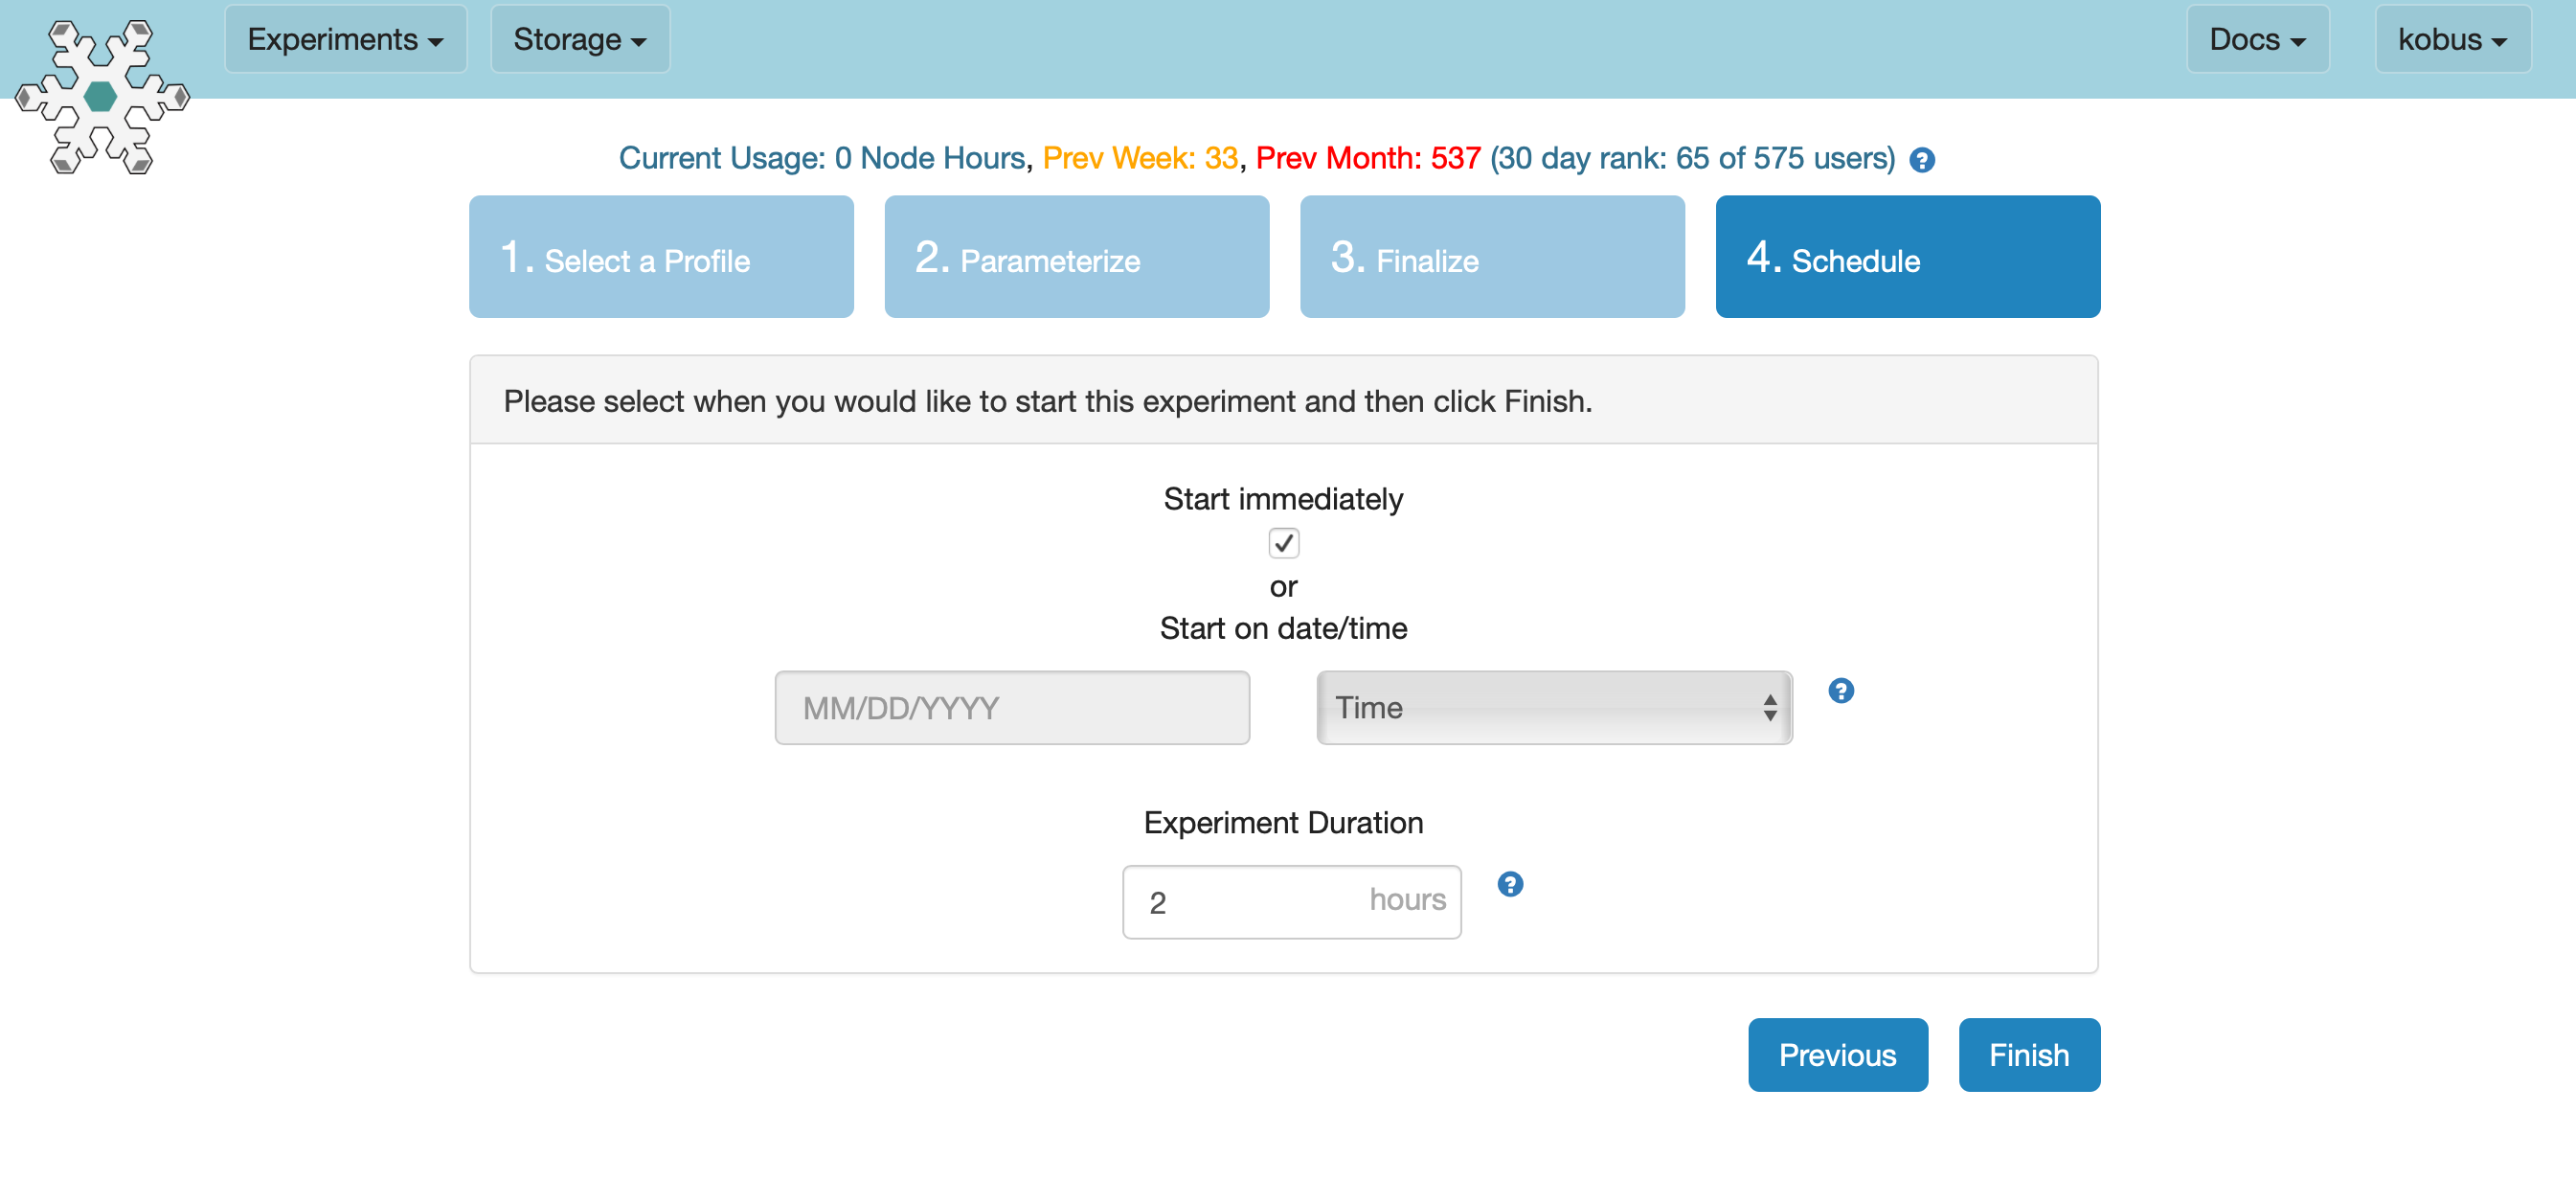
- ScheduleIn the "Schedule" step, select "Start immediately" (the default) and make sure your "Experiment duration" fits within the time period associated with your reservation.
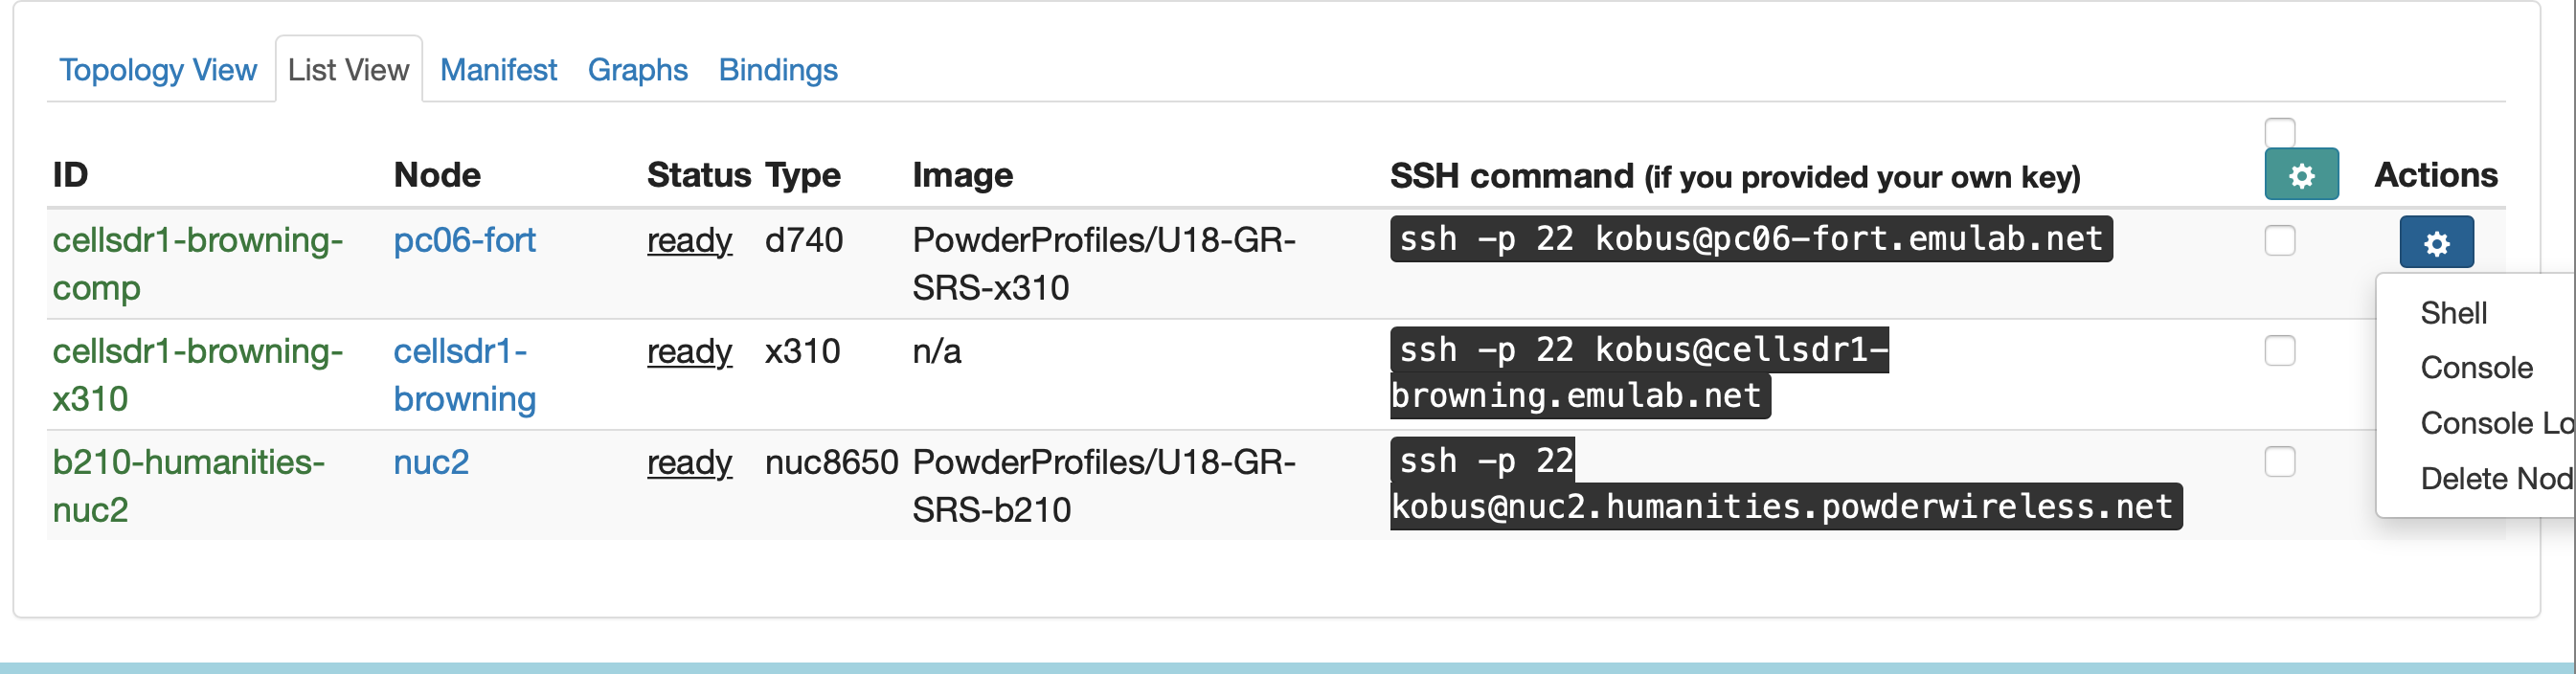
- Open a browser shellOnce your experiment is fully instantiated, i.e., shows "Your experiment is ready!", open a browser shell on the "cellsdr1-browning-comp" node: Select the "List View" tab, click on the gear icon (under "Actions") next to "cellsdr1-browning-comp" and select "Shell" from the drop down menu.Note these instructions are also available in the "Profile Instructions" tab.
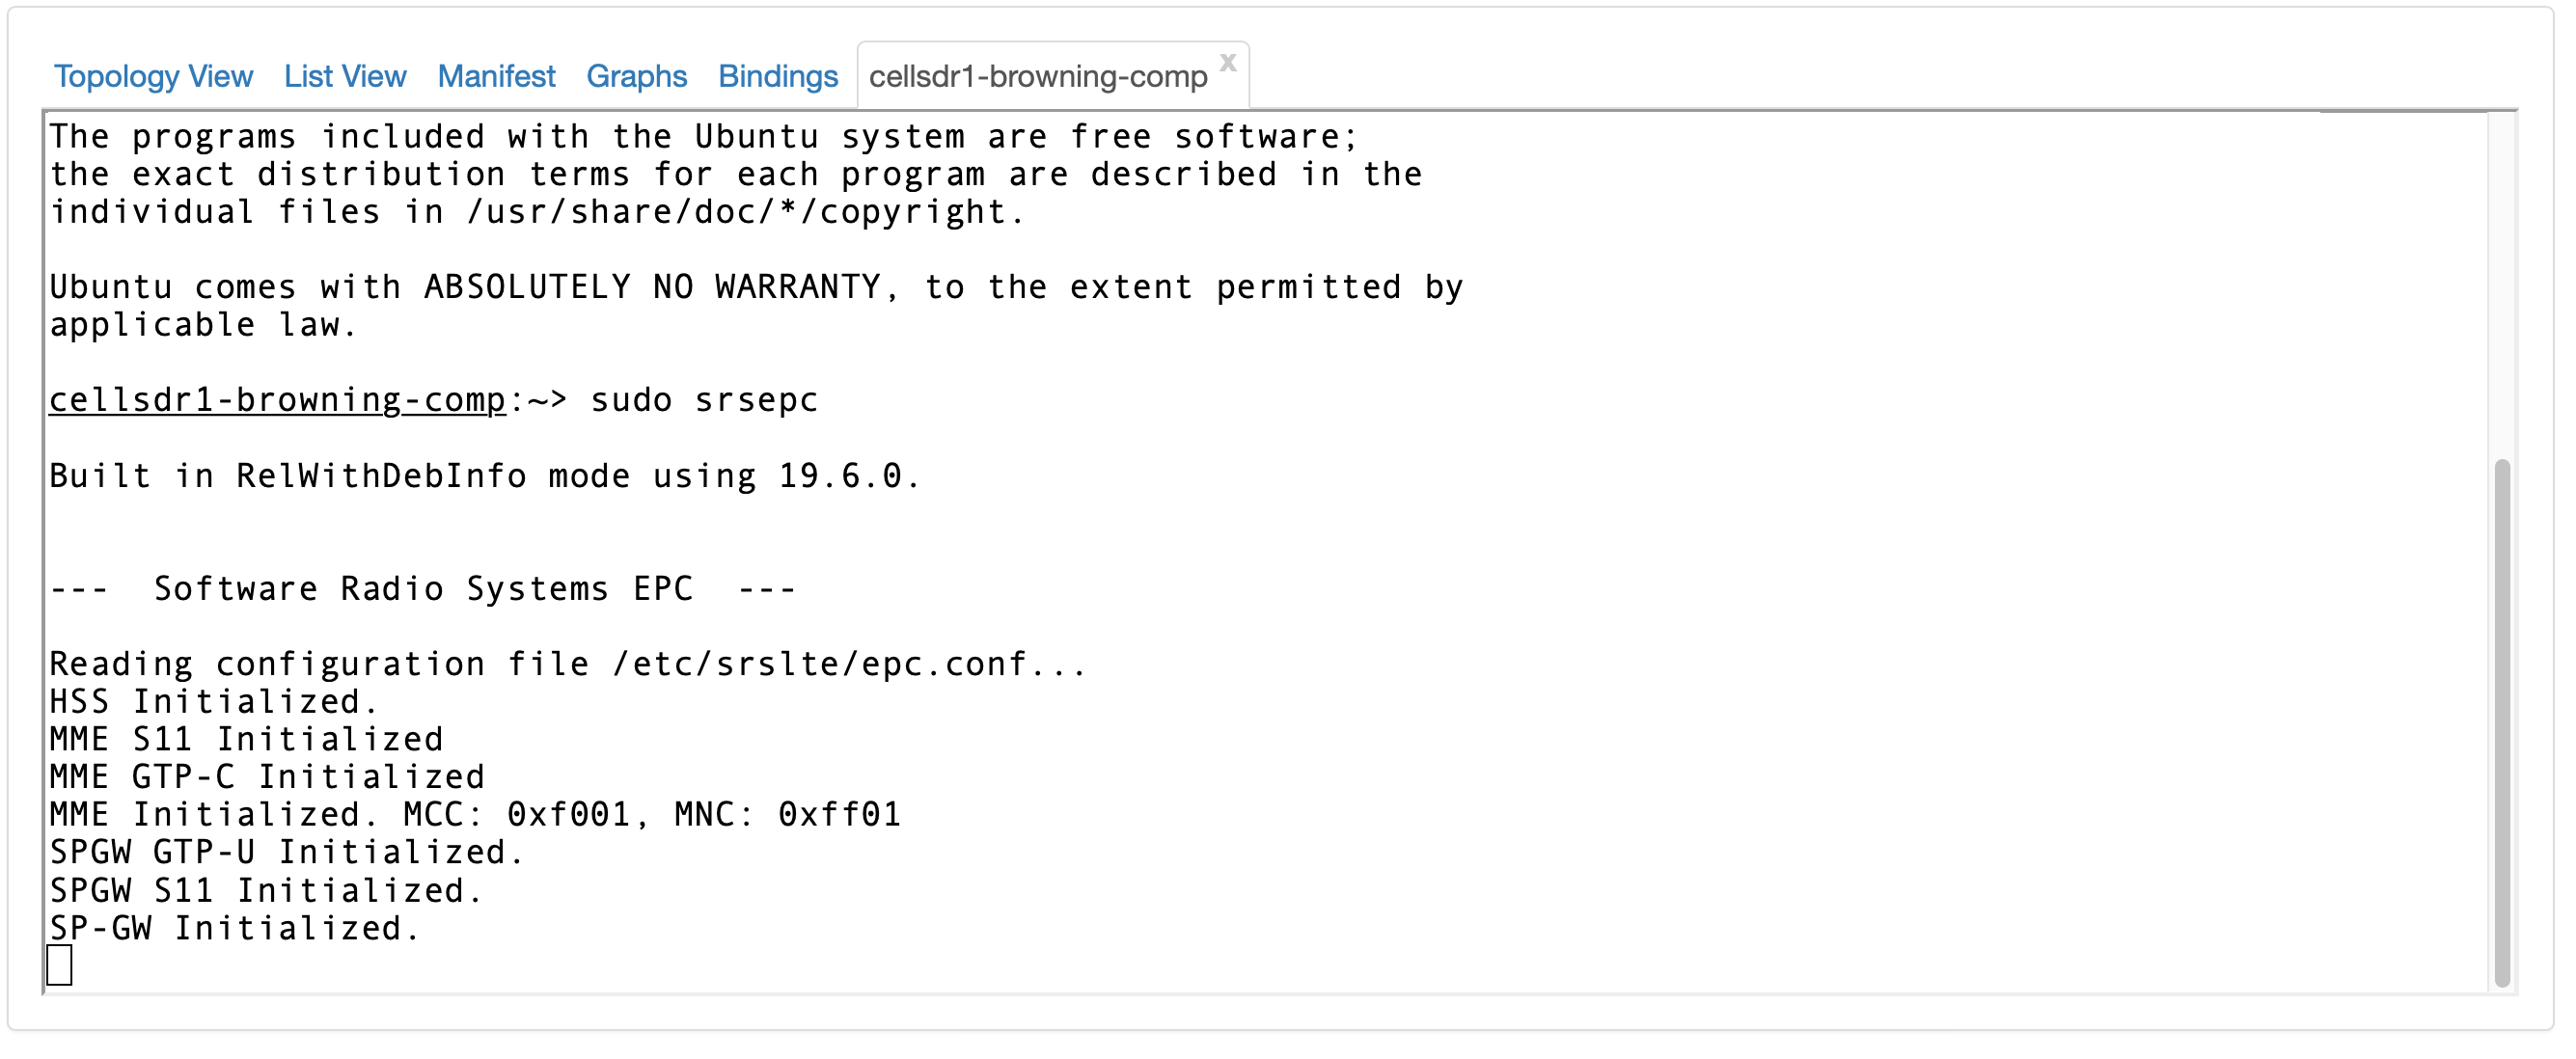
- Start up srsepcIn the "cellsdr1-browning-comp" browser shell window, start up the srsLTE EPC:"sudo srsepc"
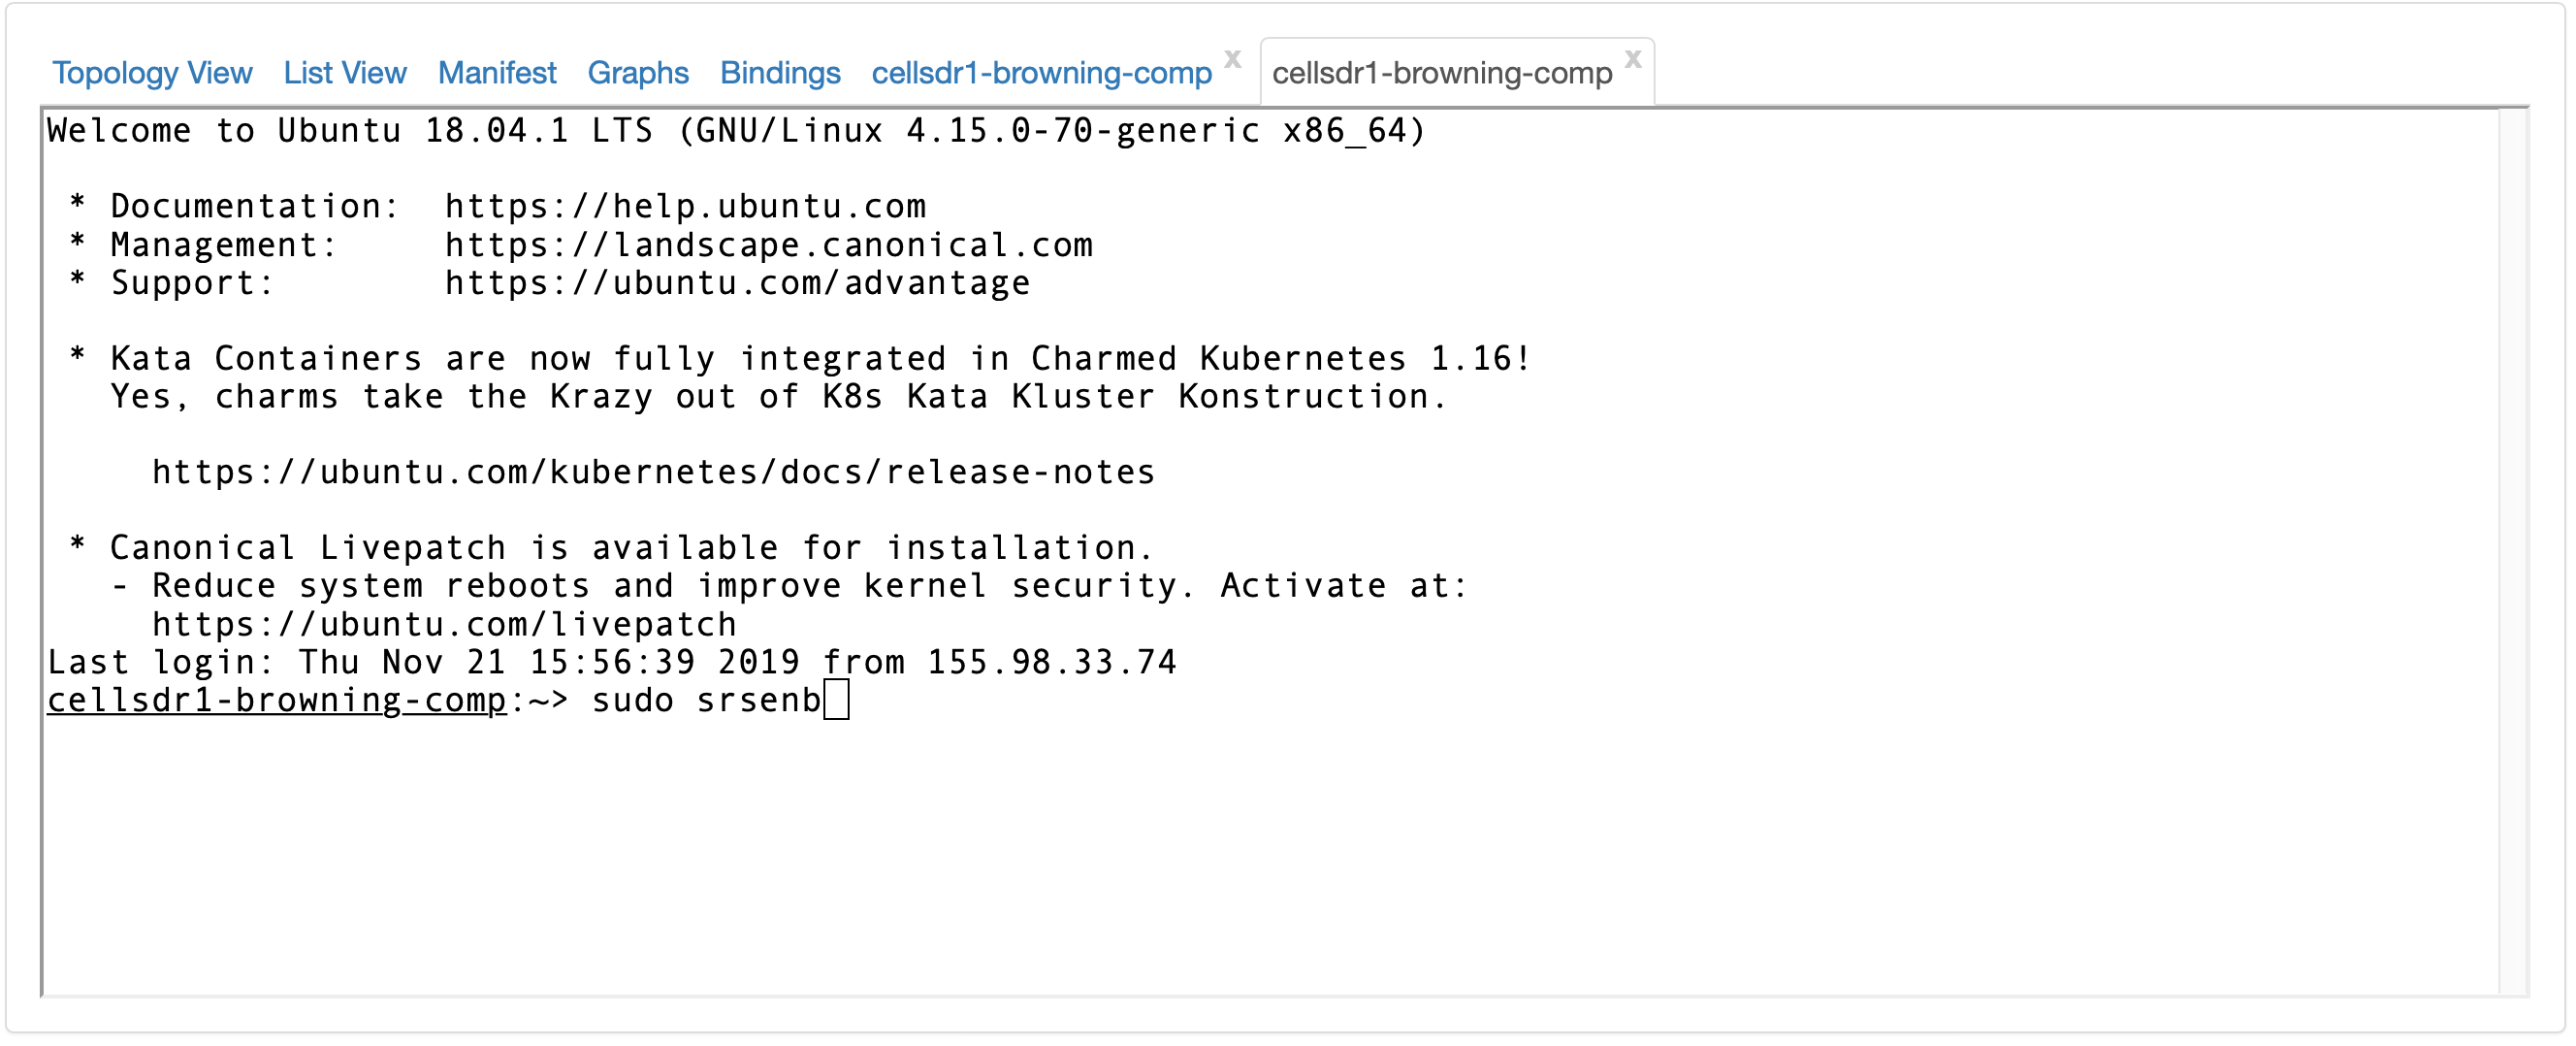
- Start up srsenbOpen another browser shell on the "cellsdr1-browning-comp" node and start up the srsLTE eNodeB:"sudo srsenb"
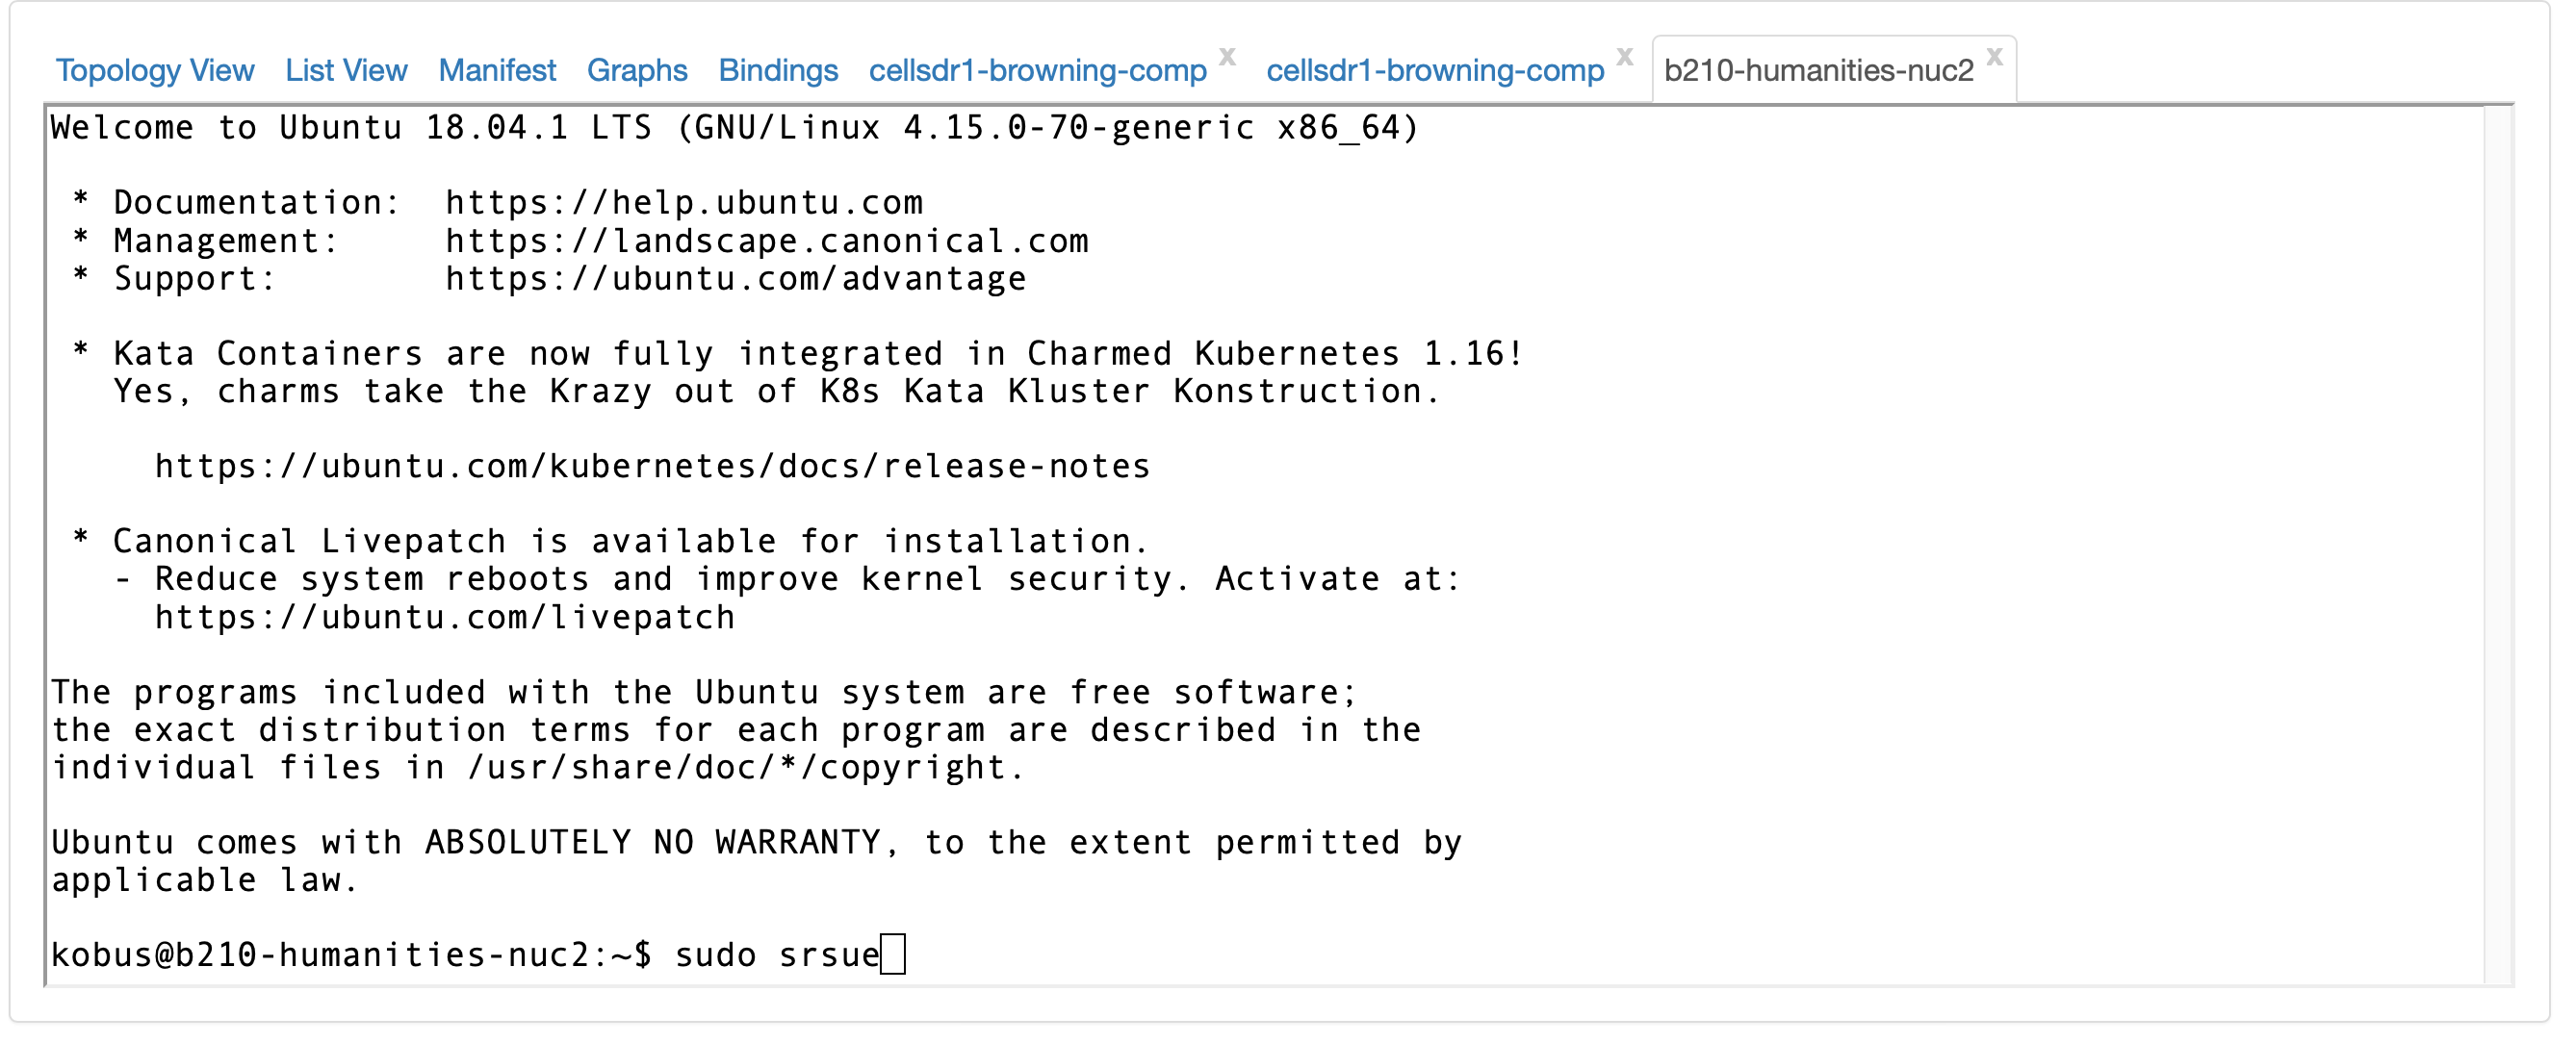
- Start up srsueOpen a browser shell on the "b210-humanities-nuc2" node and start up the srsLTE UE:"sudo srsue"
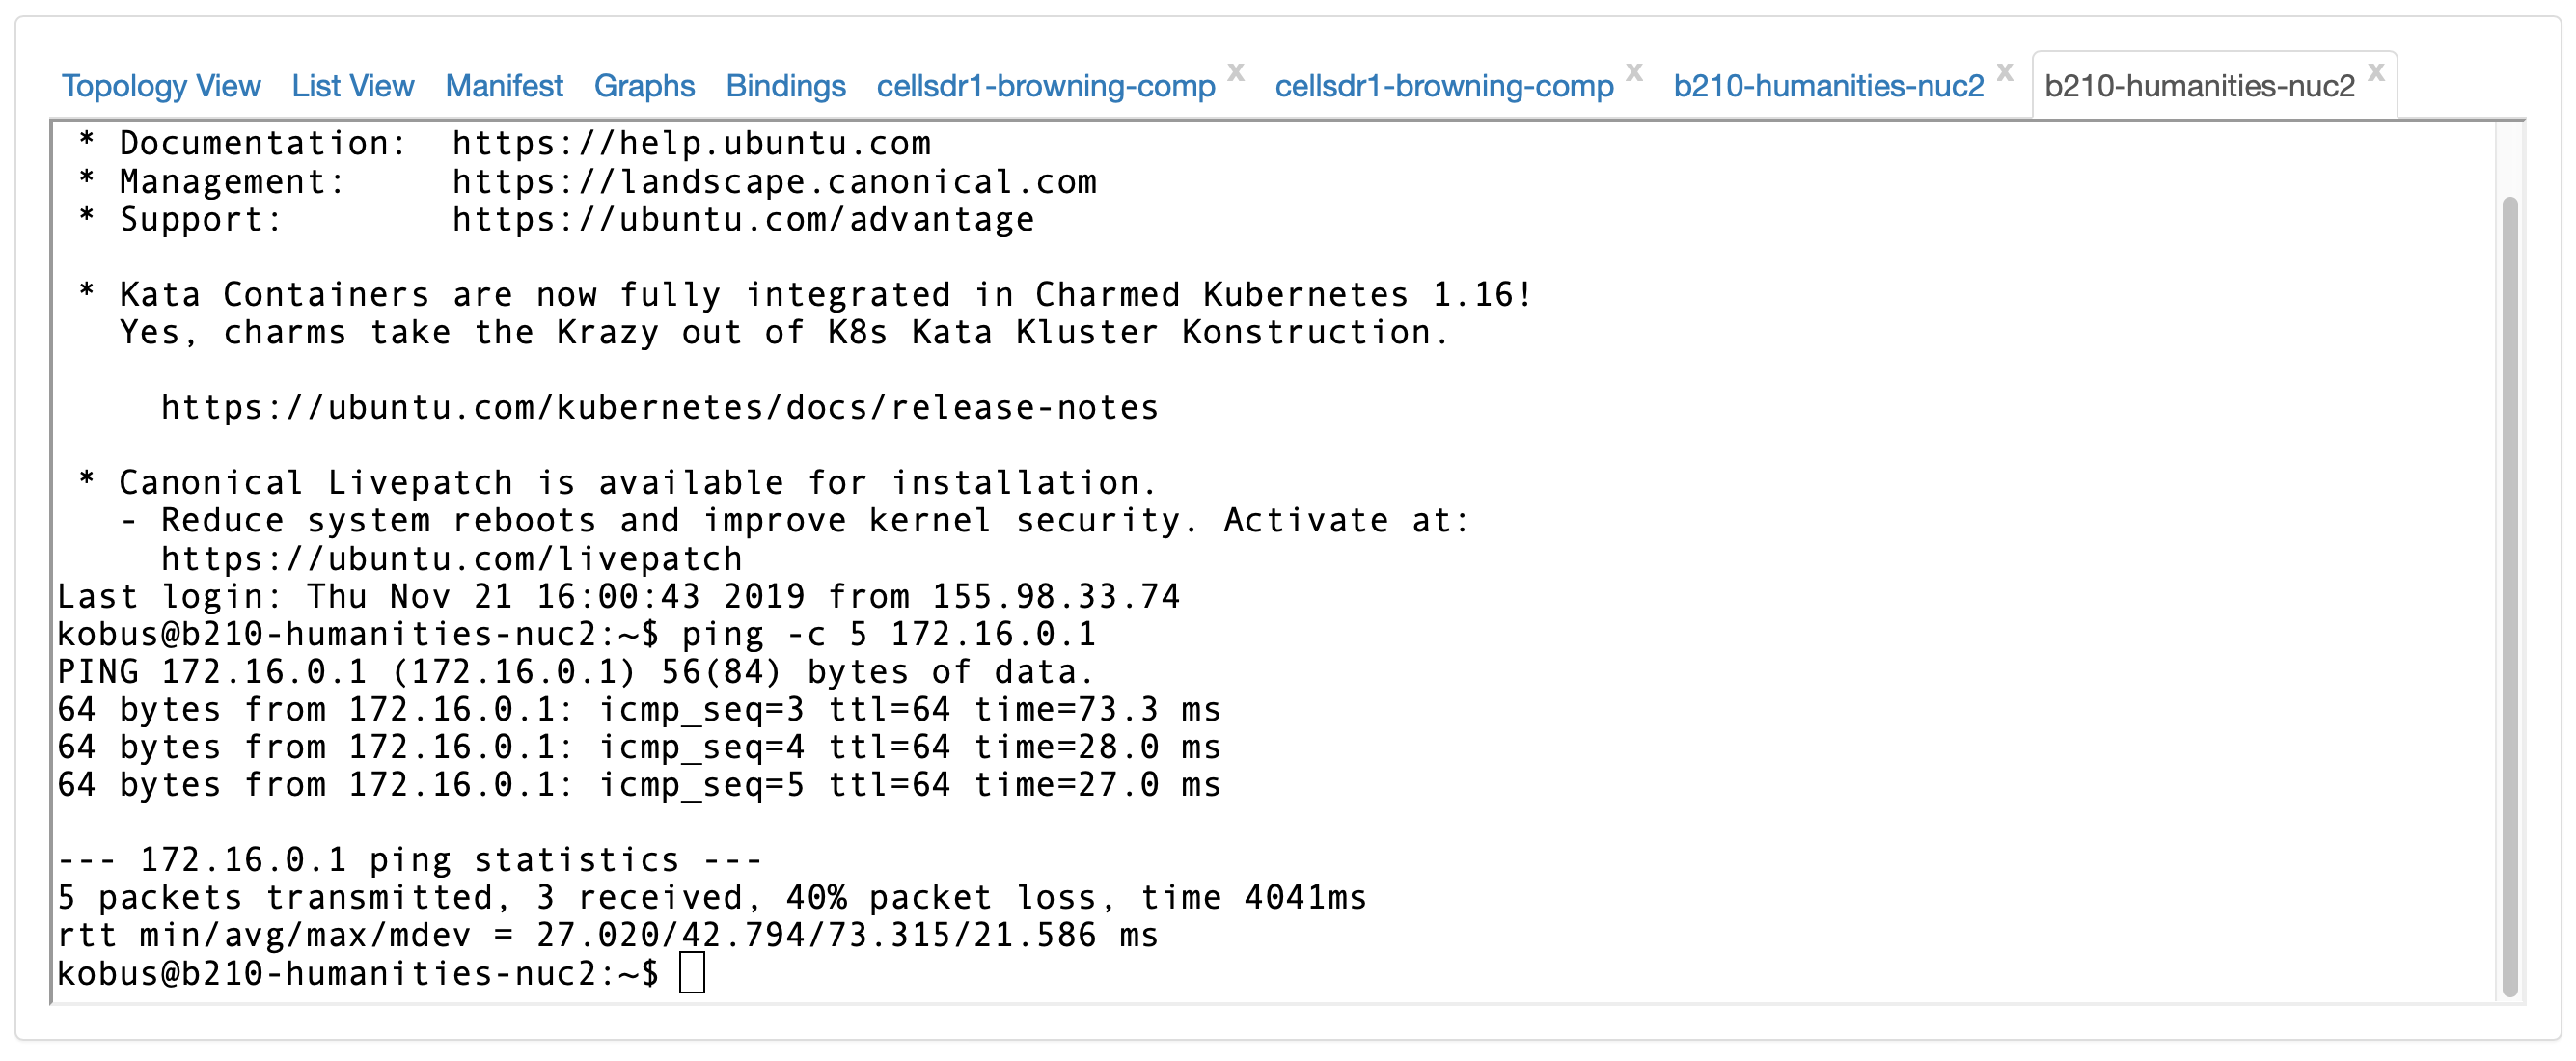
- Test UE connectivityIf your UE successfully connects to the LTE network, a "tun_srsue" interface will be created on the "b210-humanities-nuc2" node and you can verify end-to-end connectivity across your LTE network:Open another browser shell on the "b210-humanities-nuc2" node and "ping" the SGi IP address via your RF link:"ping 172.16.0.1"
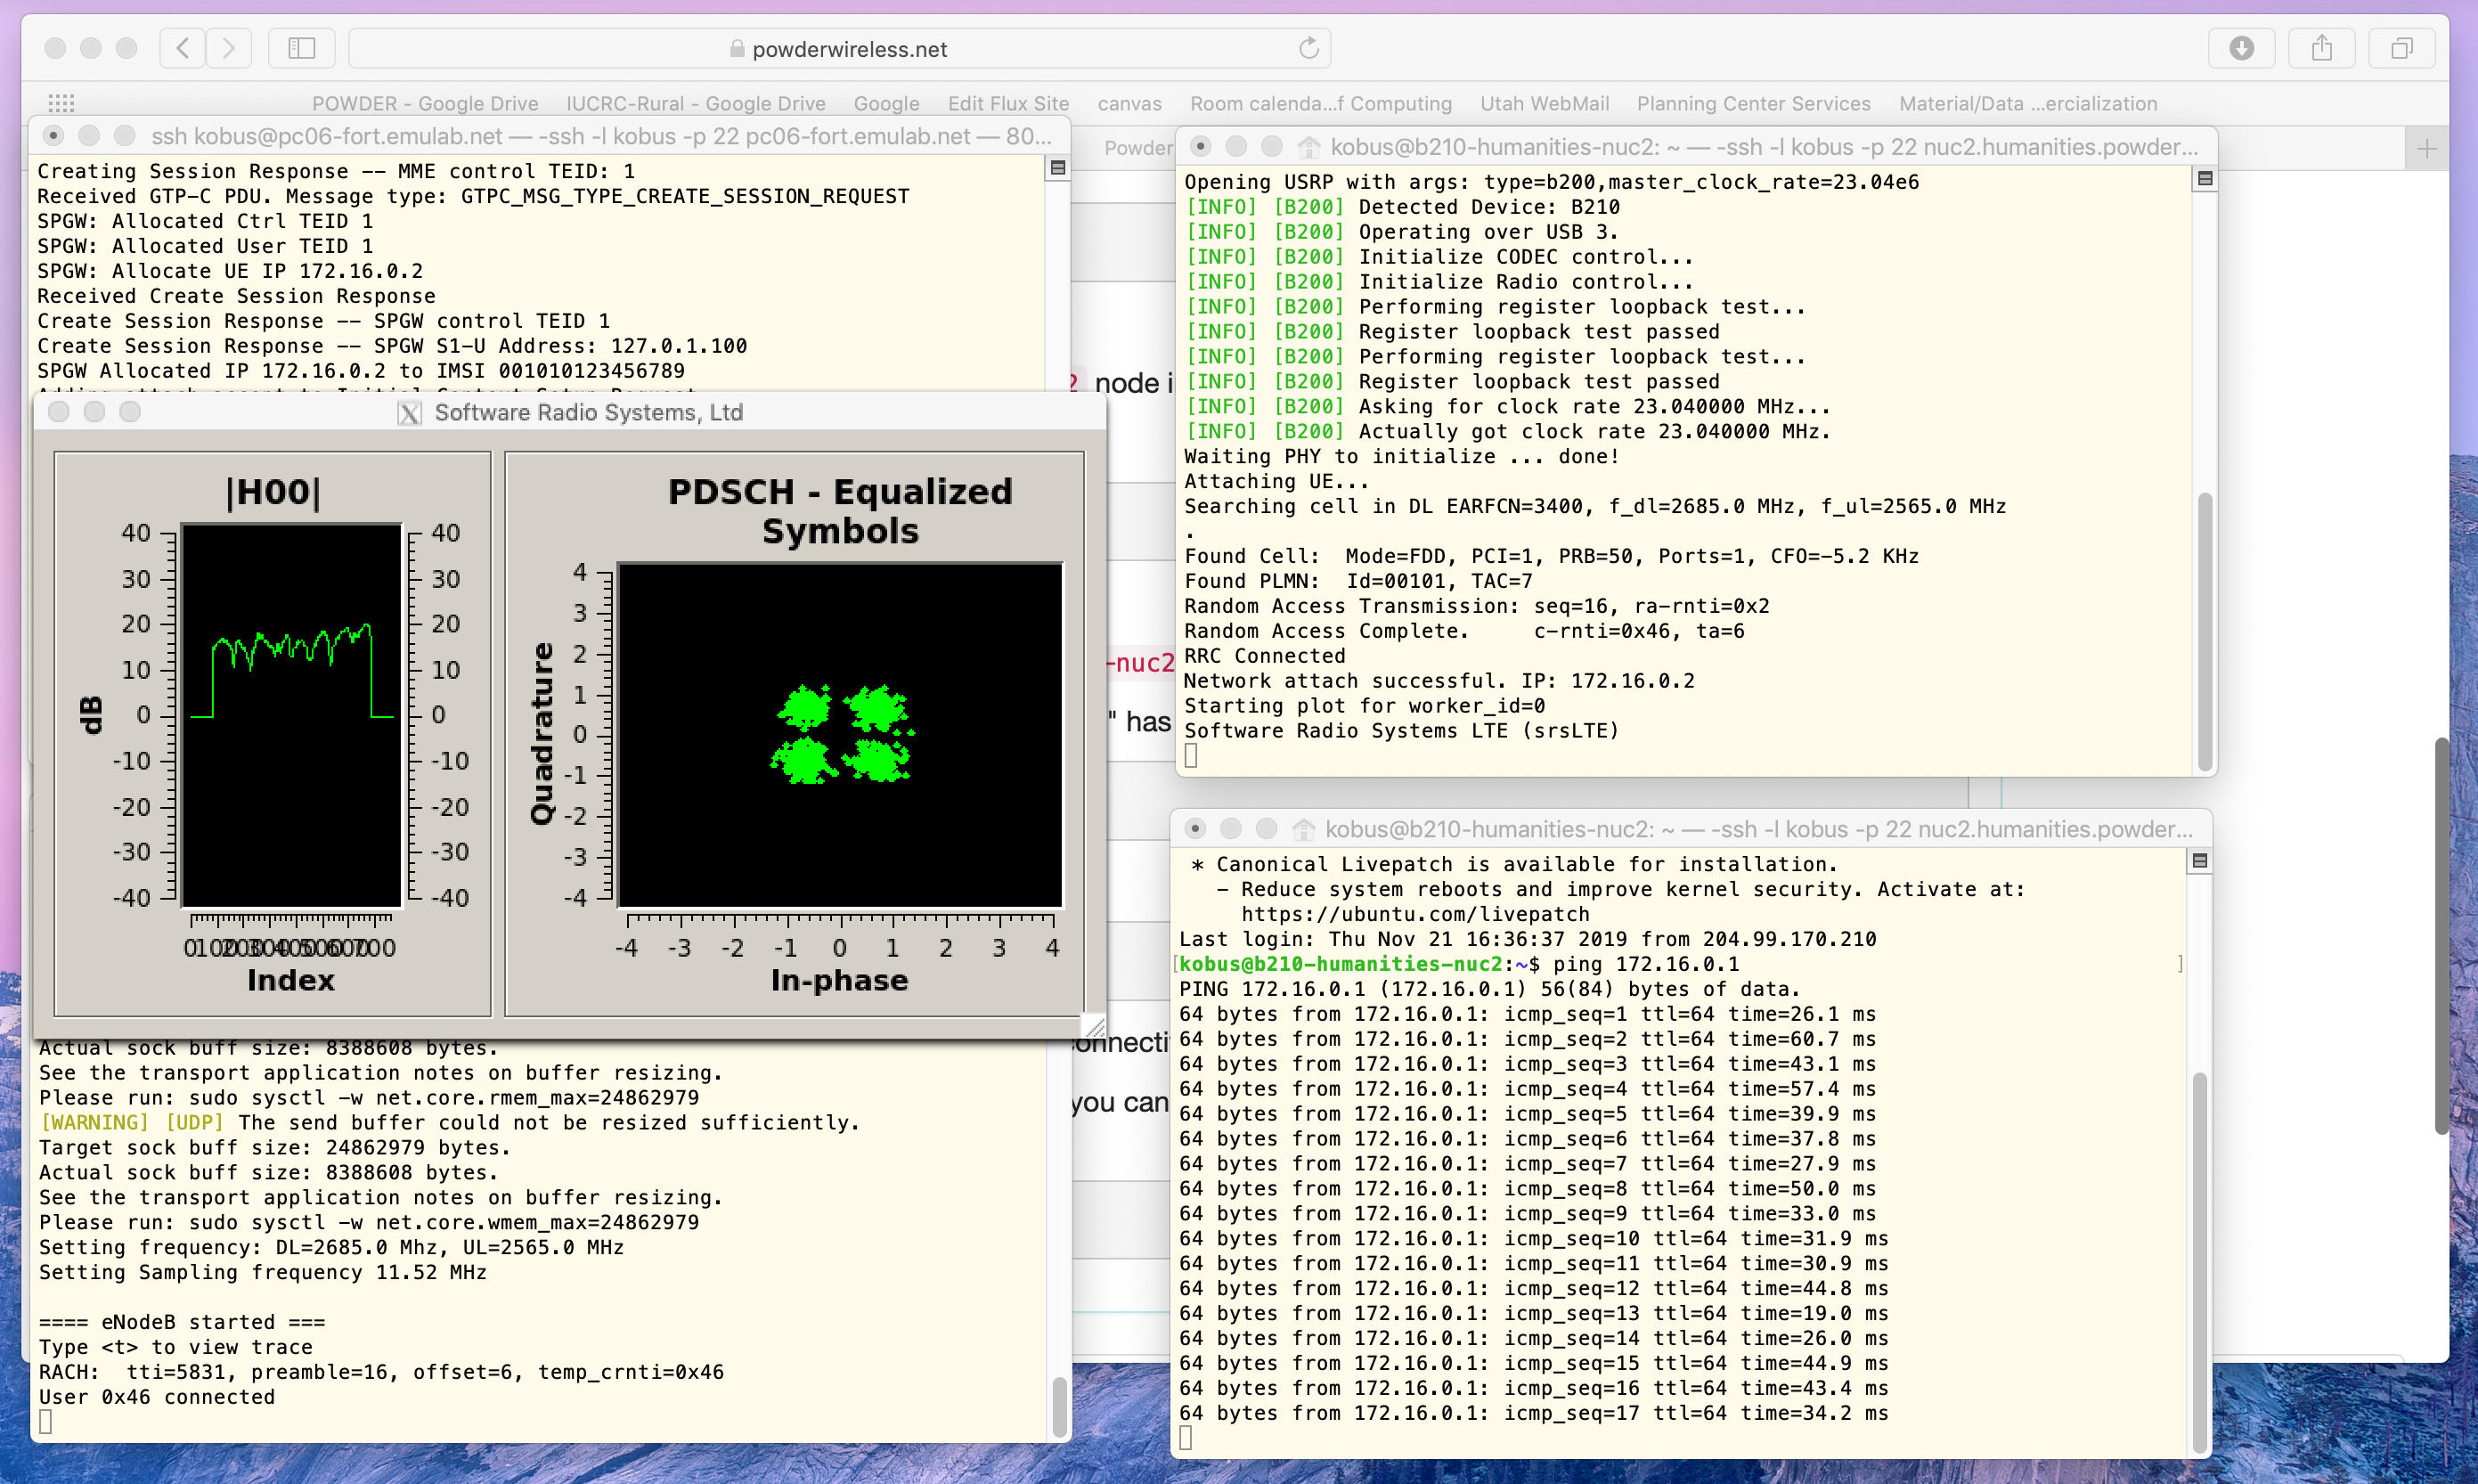
- ssh/X1 and GUIIf you have ssh and X11 enabled on your laptop/desktop, you can follow the same step described above, but instead do it via ssh shell terminals. (Select the "List View" tab, and select the ssh command (in black) next to the node you want to create a shell on. (Or run the shown ssh command from your ssh client.))In this case run the UE with GUI enabled to get a "softscope" associated with your RF link:"sudo srsue –gui.enable 1"
3.4 Next Steps
The Powder roadmap section contains useful next steps.