2026-02-02 (7dfd17e)
2 Getting Started
This chapter will walk you through a simple experiment on Powder and introduce you to some of its basic concepts.
The walk-through assumes a new user who does not have an existing account on Powder, or any of the other University of Utah testbeds (i.e., Emulab, or CloudLab). If you do have an account on one of these testbeds, you can log in with your credentials for those platforms, and use an existing project to instantiate this profile. You should also check with others in your organization to see if they already have a Powder project that you can join.
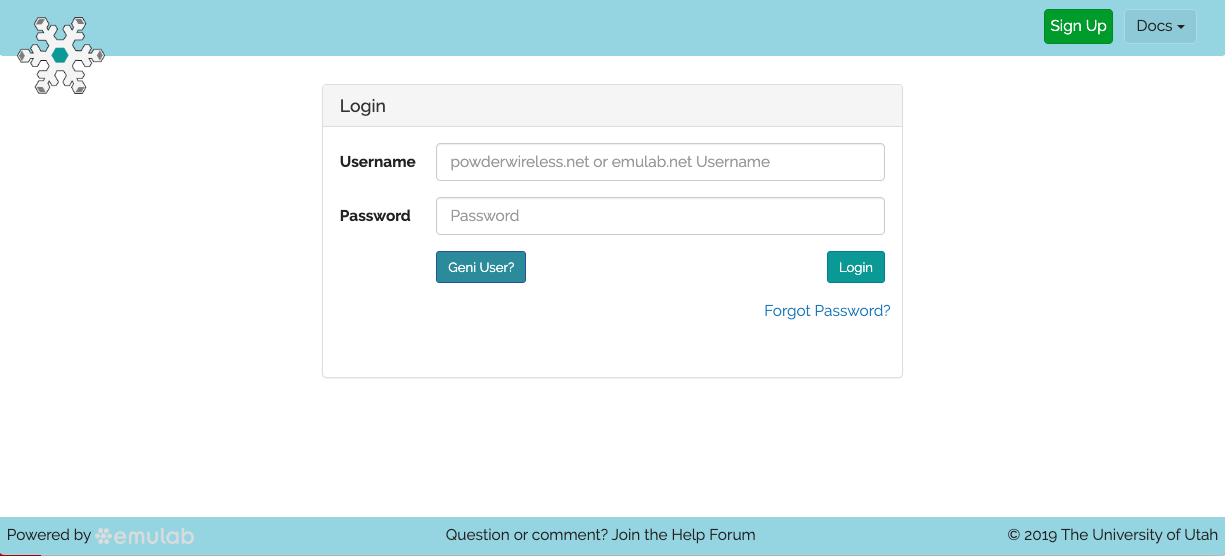
- Access the Powder portalStart by pointing your browser at https://www.powderwireless.net/. Click on the "Log In" button at the top right.
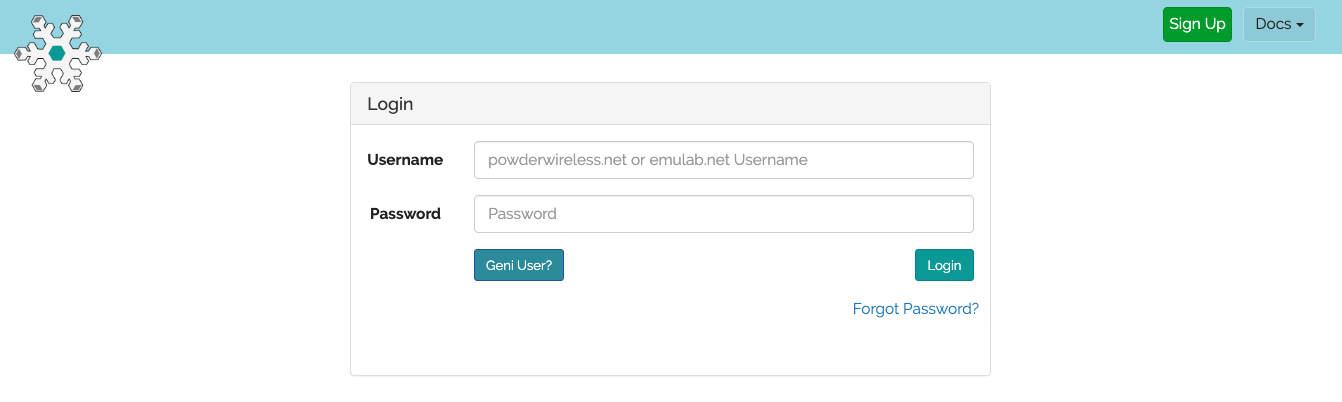
- Go to the sign-up pageClick on the "Sign Up" button at the top right to access the sign-up page.
- Sign up for an accountAssuming you, or someone else from your group or organization, doesn’t already have a Powder project you can join, click on the "Create Project" option and fill in the form to create a new one. You will also fill out information for your personal account in the process. (Note: We will not use SSH access for this activity, so you don’t need to upload an ssh key. You can add an ssh key to your account later.)

- Log inOnce your account is approved, log in at the Powder portal login page.
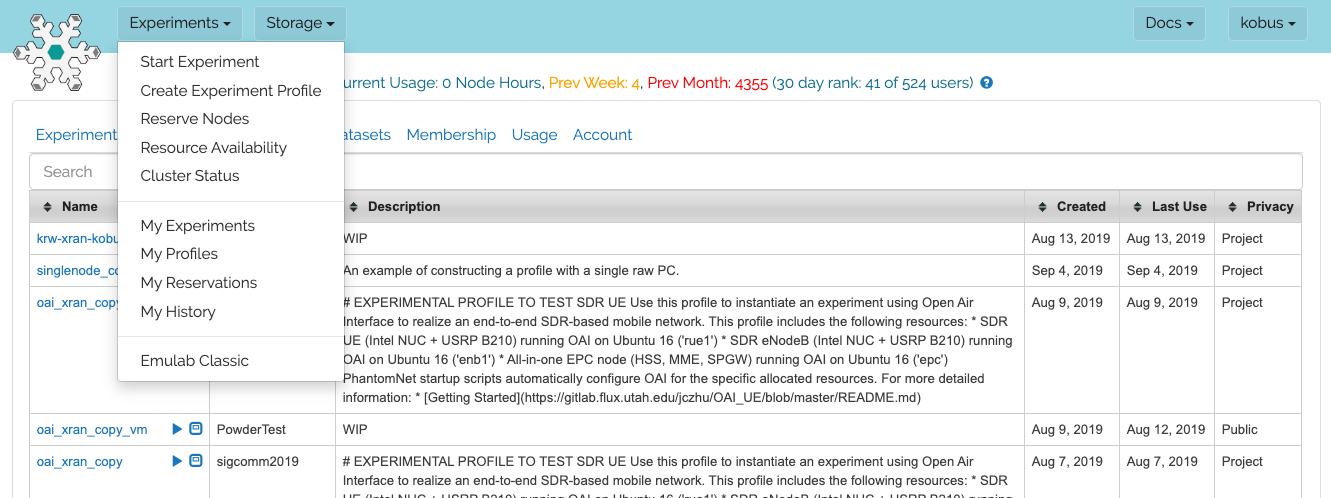
- Start ExperimentFrom the top menu, click “Experiments” and then “Start Experiment” to begin.
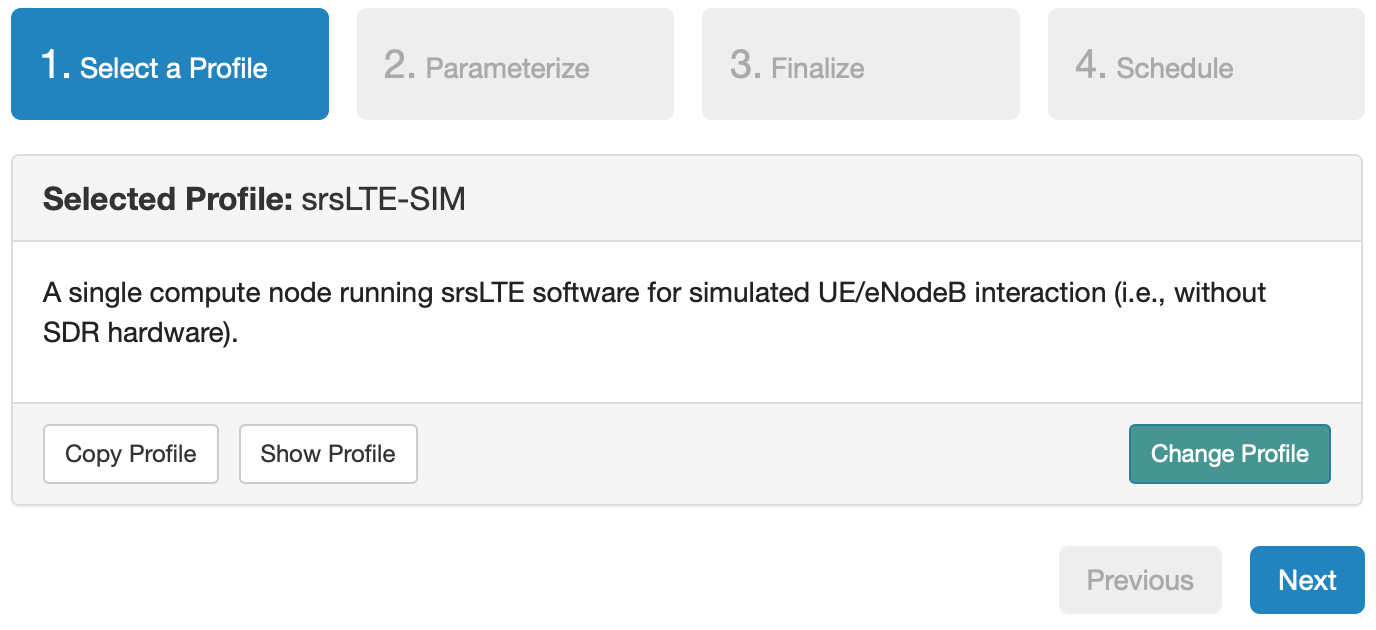
- Experiment WizardExperiments must be configured before they can be instantiated. A short wizard guides you through the process. The first step is to pick a profile for your experiment. A profile describes a set of resources (both hardware and software) that will be used to start your experiment. On the hardware side, the profile will control what type of equipment you get (e.g., physical machines, virtual machines, rooftop-SDRs, fixed-endpoint SDRs etc.) how many there are, and what the network between them looks like. On the software side, the profile specifies the operating system and software to be used in your experiment.Profiles come from two sources. Some of them are provided by Powder itself, and provide standard installation of popular operating systems, software stacks, etc. Others are created by other researchers and may contain research software, artifacts and data used to gather published results, etc. Profiles represent a powerful way to enable repeatable research.Clicking the "Change Profile" button will let you select the profile that your experiment will be built from.
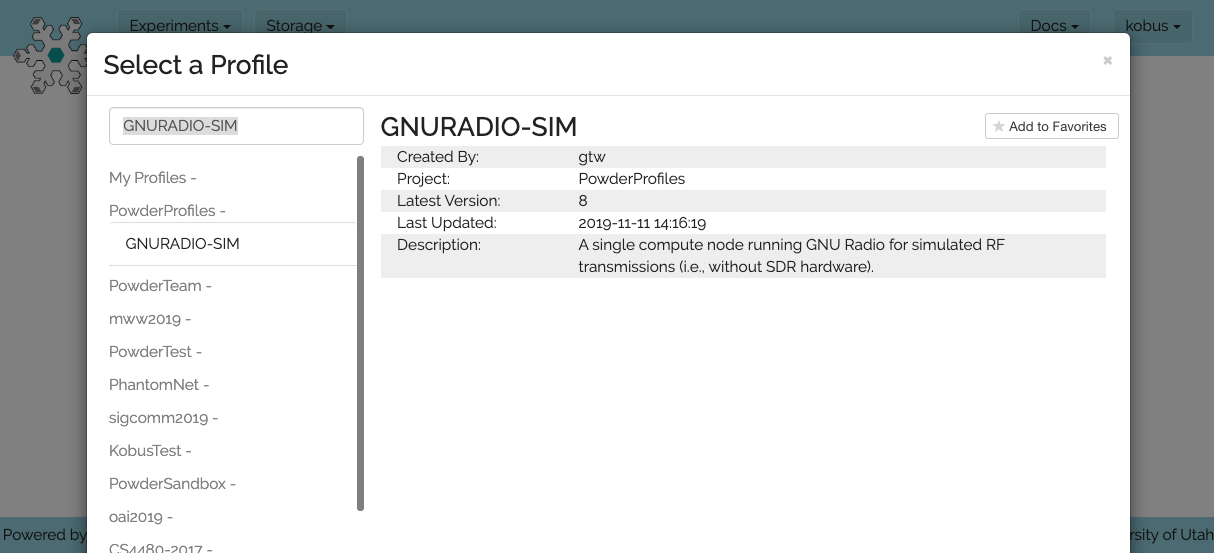
- Select a profileOn the left side is the profile selector which lists the profiles you can choose. The list contains both globally accessible profiles and profiles accessible to the projects you are part of.Enter "GNURADIO-SIM" in the search box to select a profile provided by the Powder team.The dialog box on the right shows a description of the resources the profile will use. In this case the profile consists of a single compute node on which the GNU Radio software suite is installed.Once you selected the profile you will be back on the Experiment Wizard and can select "Next" to proceed.
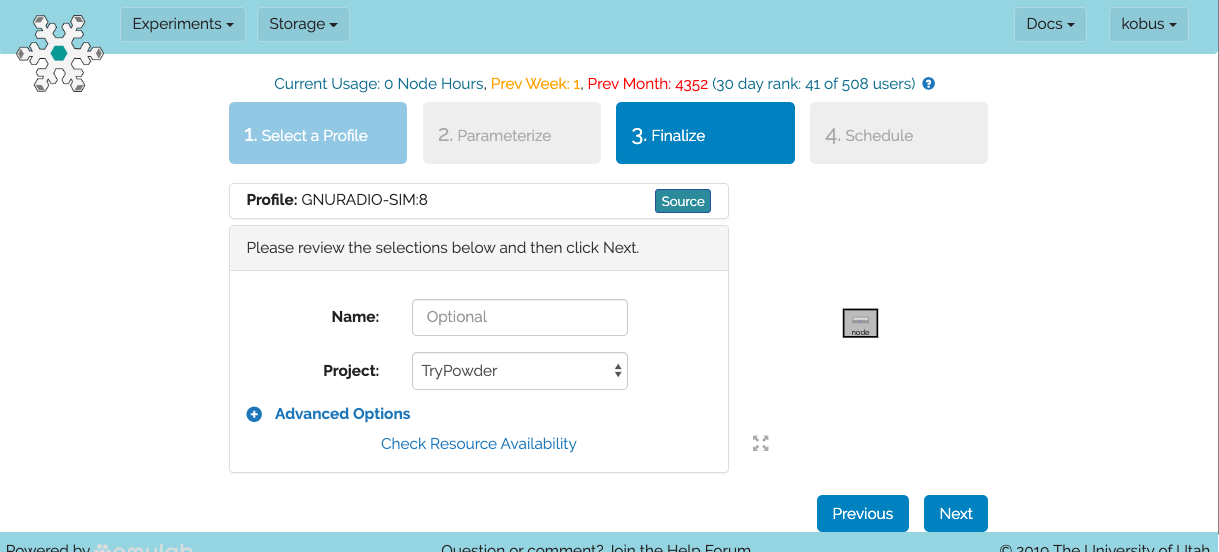
- FinalizeSome profile require the selection of parameters in the second step of the Experiment Wizard. The GNURADIO-SIM does not require any parameters, so you will end up directly on the "Finalize" step.At this step you can (optionally) provide a name for your experiment and select your new project if you have the option to do so. (Users who are only members of one project will not have the option to select a project.)Select "Next" to proceed.
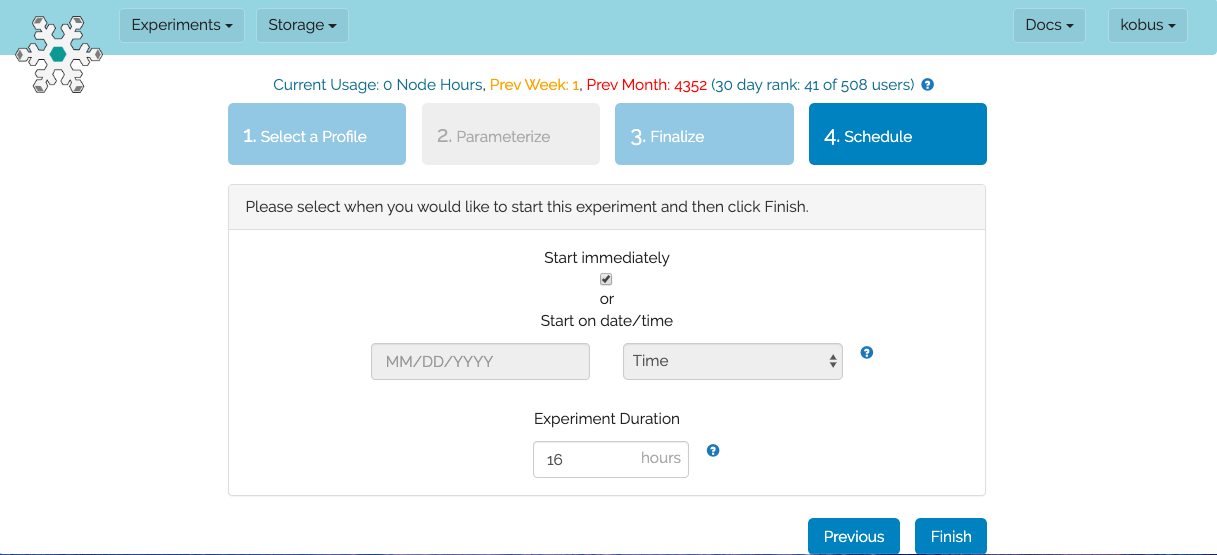
- ScheduleOn the "Schedule" page you have the option of scheduling the start of your experiment. You can leave the start date and time blank to start immediately, or enter a future time. You can also enter an experiment duration, or stay with the default of 16 hours. (Note, if needed, you can extend the duration of you experiment later in the process.)For this activity, simply stay with the defaults and select "Finish" to instantiate your experiment.
- InstantiatingAssuming the resources requested by your profile are available, the Powder control framework will start instantiating your experiment.Note that is not uncommon though, for the requested resources not to be available, in which case you wil receive an error from the platform at this point. Resource contention issues can be dealt with by reserving resources ahead of time.
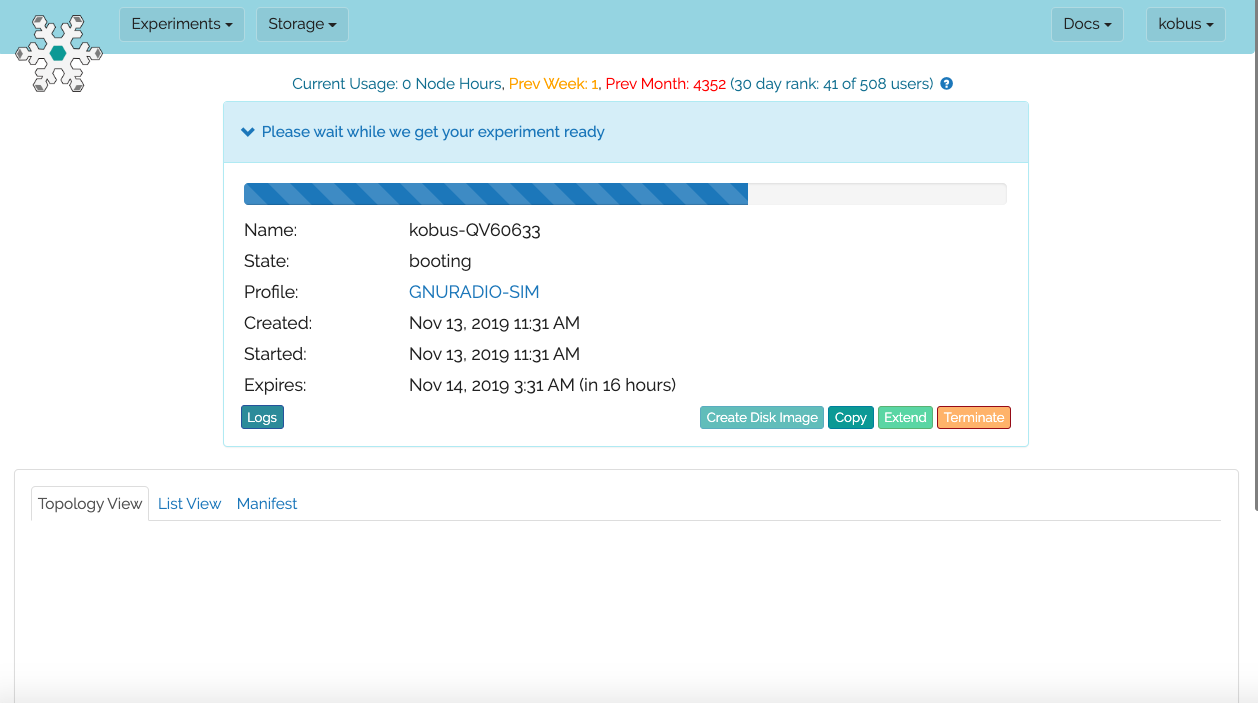
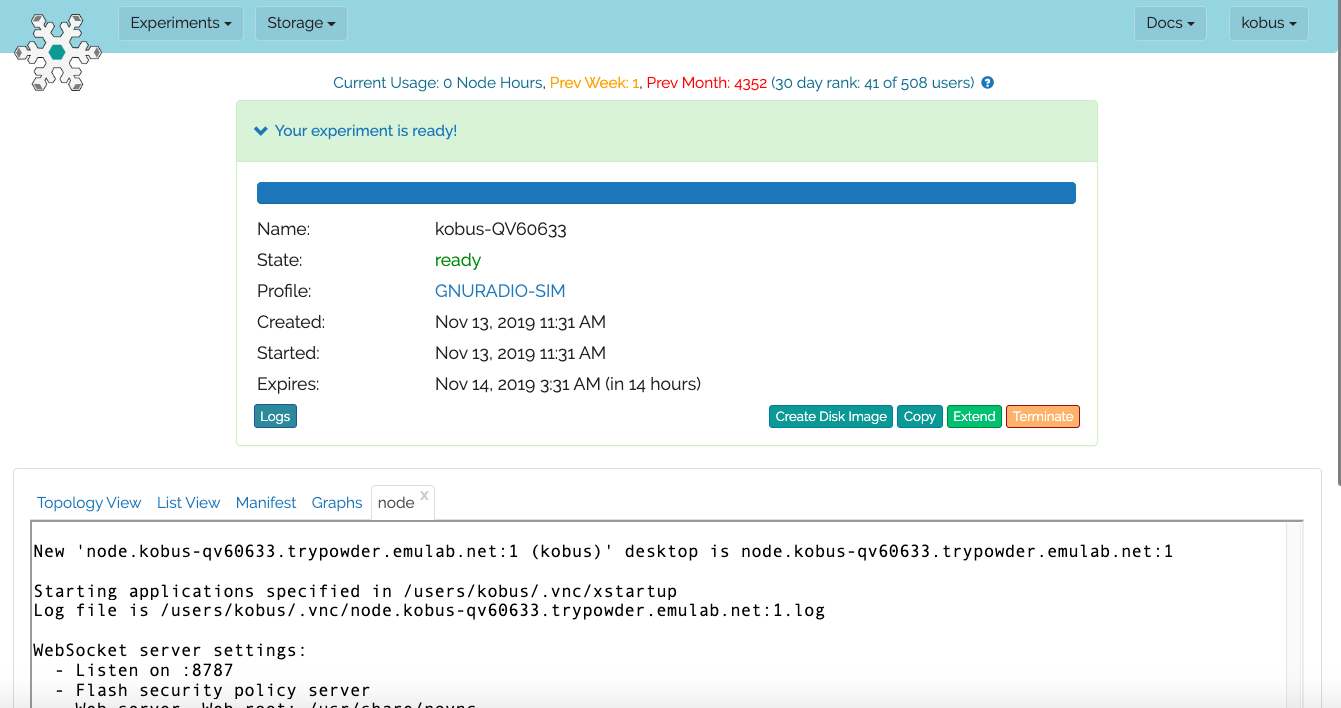
- Experiment readyOnce your experiment has successfully been instantiated, the progress bar will be complete, the status tab will turn green, showing "Your experiment is ready!" and you’ll be given a number of new options at the bottom of the screen with which to interact with your experiment. However, before proceeding to the next step, make sure that the "Startup scripts are still running" message is no longer present.
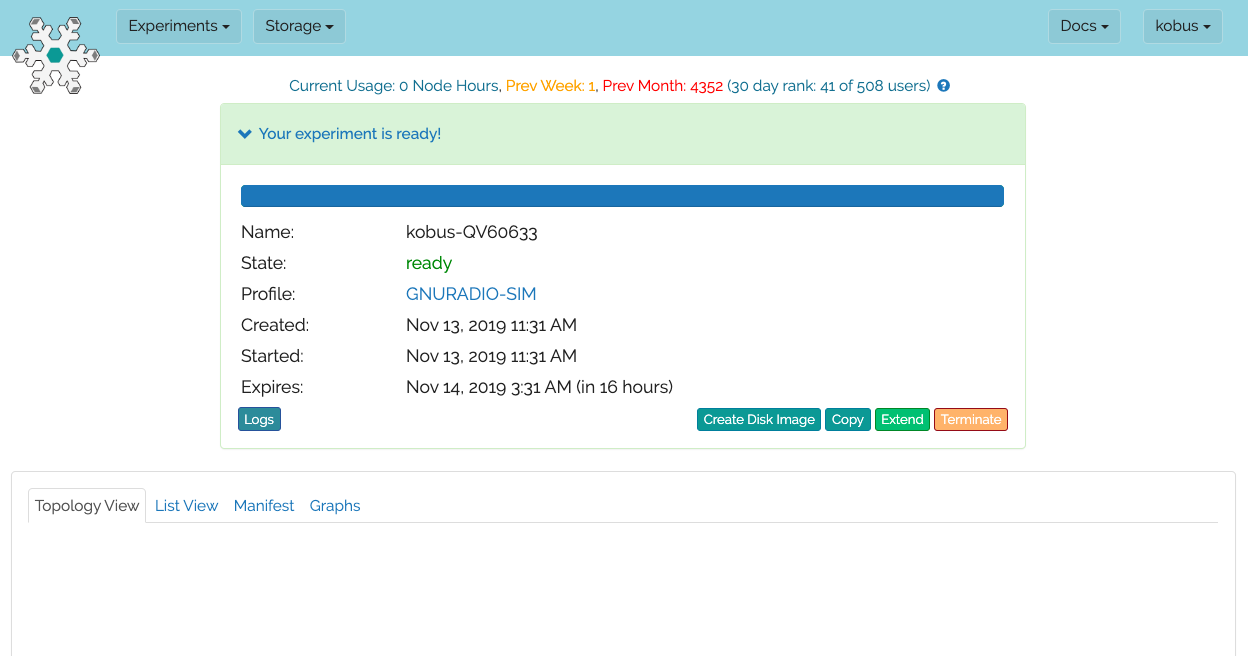
- Open VNC windowClick on the "List View" tab on your portal experiment view. Make sure the "Startup" column shows "Finished"; otherwise, wait for it to change from "Running" to "Finished". Click on the gear icon associated with the "node" line and select "Open VNC Window" to open a VNC-based X Windows session on the node in your browser. It should show up in either a new window or a new tab.

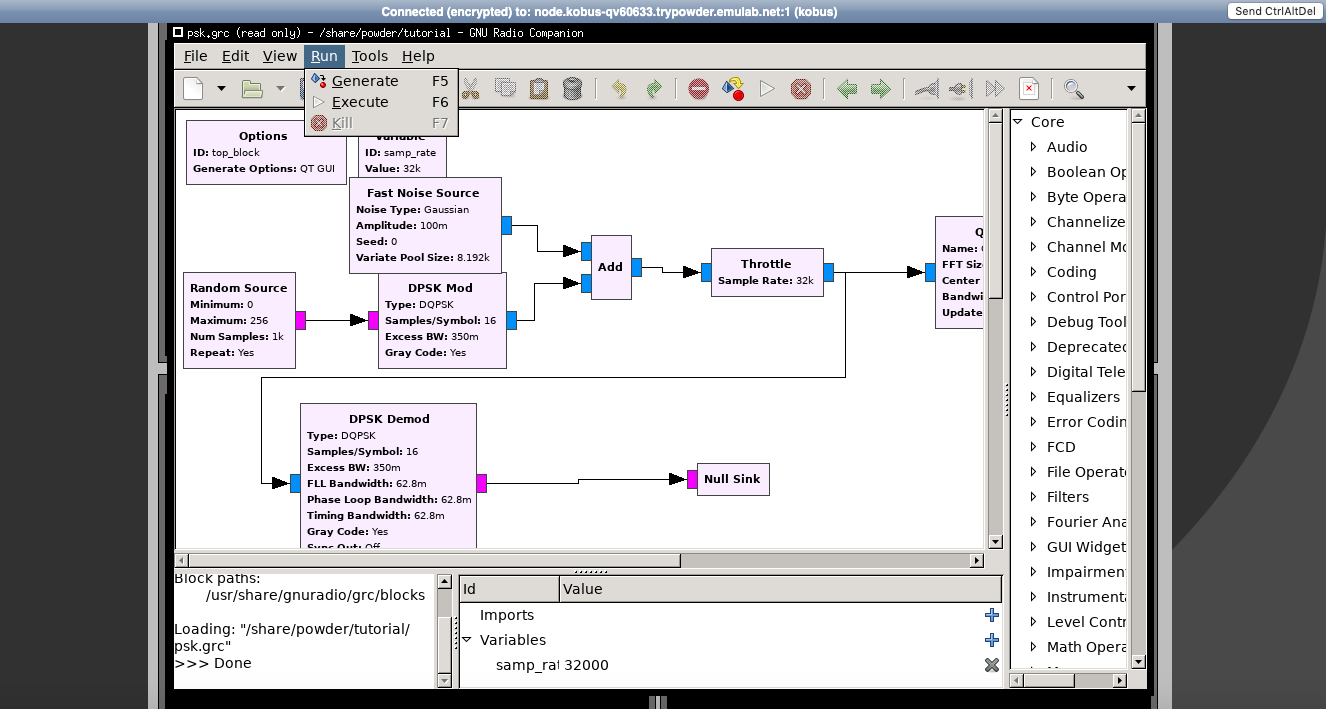
- Run gnuradio-companionThe VNC session will start with a single x-term terminal window.Enter gnuradio-companion /share/powder/tutorial/psk.grc in the terminal to start up gnuradio-companion with a simple example GNU Radio flow graph.

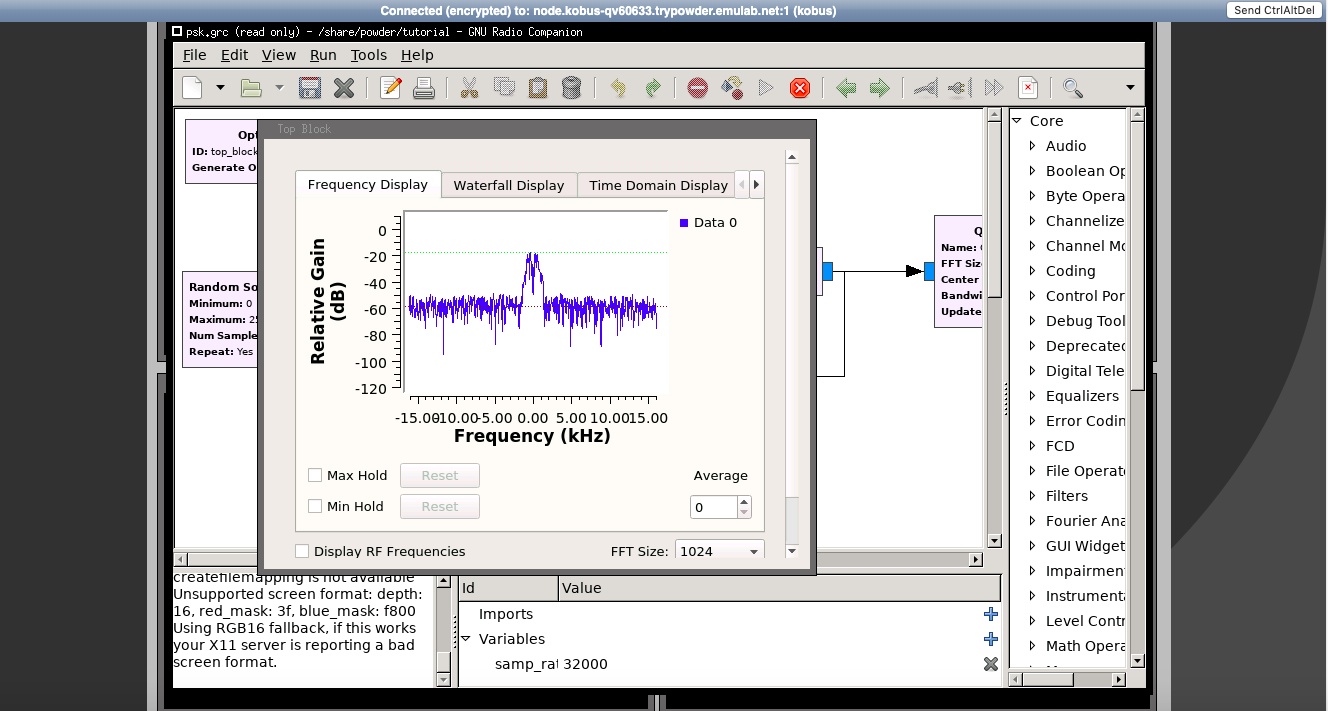
- Execute the GNU Radio flow graphClick "Run" and then "Execute" to execute the example GNU Radio flow graph.
- Working with gnuradio-companionFeel free to further explore gnu-radiocompanion and/or make changes to the GNU Radio flow graph.As is the case with all Powder experiments, this is your personal instance and you can modify it as you see fit. And indeed, if you mess things up you can simply re-instantiate a new pristine copy! Note that the source grc file is read-only, so you will need to use "File -> Save As" in GNU Radio Companion to save it to, e.g., your home directory in order to make changes.A word of warning: Powder does not persist any changes that you make, or data that you generate, in an experiment. So, if you create anything during an experiment that you want to keep, you need to copy it off your experimental node(s) before you terminate the experiment (you can use scp, rsync, or a similar tool).
- Terminate your experimentOnce you are done exploring your experiment, it is good practice to explicitly terminate it. Click on the "Your experiment is ready!" link and select the "Terminate" button.Note that if you do not terminate your experiment explicitly, your experiment will terminate automatically after a few hours. Again, when the experiment terminates, you will lose anything on disk on the nodes, so be sure to copy off anything important early and often. You can use the "Extend" button to submit a request to hold it longer.
2.1 Next Steps
The Powder roadmap section contains useful next steps.